Creating kitchens and baths for finicky customers since 1993


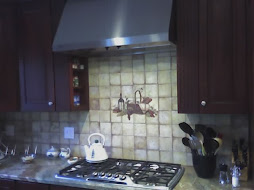
backsplash features inset metal tiles for accent and texture

Saturday, November 20, 2010

Toilet Repairs: How to fix a troublesome toilet

by Jim Bessey

Troubleshooting common toilet problems

Not a single fixture or appliance in our homes is more crucial to our sanity than the lowly toilet. We expect our commodes to work every time, and we cringe with foul distaste when one fails in its humble mission. Yet a malfunctioning toilet must be fixed post-haste! If the kitchen sink is clogged, that can wait. Not so the potty. And it's all so distasteful: it's damp, perhaps a bit moldy inside, fouled by unspeakable germs and vile gunk no human should touch. The thought of calling a plumber, however, conjures visions of an exorbitant and illegible bill for emergency service.

Here are three secrets, revealed: First, you probably can repair that mis-behaving toilet yourself. Second, toilets aren't nearly as complicated as you fear. And last, except in the case of a truly disturbing overflow of the bowl, your toilet is much cleaner than you might expect. On the other hand, your fears of a pricey service call are well-founded. It's not at all unusual to pay almost $200 for a plumber's visit. For about $50 more than that, you could have a new toilet installed. It's worth your time, worth overcoming your reluctance, to at least give it a look.

Anatomy of the common toilet (U.S. design, residential):

Bird's-eye toilet view
Starting at the top: THE TANK. Although there are endless variations in shape and size, every commode has a water reservoir, usually a separate tank that holds ordinary tap-water used for flushing. A pipe emerges from the wall or floor nearby; most often you'll find a shut-off valve (with a small handle of some sort), which leads fresh water through a supply tube up to the tank. [Some tanks are cast as a unit with the bowl. This is a designer trick which makes repairs and replacement deliberately more expensive.]

Below the tank: THE BOWL. This part of the commode holds a second reservoir of water, necessary for effective flushing and for sealing off the sewer line from the air in your home. Most of us believe the toilet bowl to be hopelessly contaminated with exotic microbes. Unless you never clean it, that simply isn't true. Your kitchen sink almost certainly harbors more hazardous germs, especially if you have a garbage disposal.

The bowl covers the critical DRAIN. This is an two- to four-inch opening in the floor, leading directly to your main sewer or septic line. A clogged drain line doesn't even involve the toilet fixture itself; the problem's in the pipes. If your trouble lies in the drain line beneath the floor, that's the right time to call a plumber.

Things that can go wrong, and can be fixed:

Your shut-off valve can become clogged over time. If the tank seems to take an eternity to fill, the valve may need replacement. There's a second shut-off inside the tank, too: the one that sometimes doesn't stop running after you flush. For most toilets, that part costs less than $20 to replace. A typical brand of tank-filler is "Fluid-Master," sold in every hardware store. If you can shut-down either your water main or the valve with the handle below the tank, then you can do this job yourself. Cures most slow-fill or won't-stop-running issues.

Sometimes the "flapper" fails to function. In this case, water continually seeps or gurgles into the bowl (possibly wasting hundreds of gallons a week). Jiggling the handle is a common short-term solution. However, while the flapper's design varies from brand to brand, most home-owners can handle replacing that part themselves. Turn off the toilet's water supply for this chore, too.

The most humbling and distasteful problems come when the drain becomes clogged. If your handy plunger fails to clear the clog, go ahead and call a plumber. You could try "snaking" the drain yourself, but that's not a job for the faint-of-heart. Clogged drains can usually be blamed on some variation of "too much toilet paper." Prevention, and education of blissfully ignorant family members, is the only way to avoid recurrence.

The critical point: try not to be afraid. It's only a toilet. You don't have to be a rocket scientist to show the commode who's boss.


  Reprinted from the original on Helium.com.   copyright 2010 - Jim Bessey 
Read Jim's profile at Helium.com 
_______________________________________________
See this story as it appears on Helium.com 
    For more How-To Guides, see our new How To page, hosted here.

Tuesday, November 09, 2010

New How-To Guides page added to Kitchens & Baths by D'Zyne blog

Added today: How to build a storage shed and How to install a GFCI receptacle.

Helium's How-To Guides zones page system offers pics, articles, and more!
Earlier this year, Blogger added a nice little Pages system that allows us to display stand-alone web pages within our blogs. I've wanted to add my recent How-To Guides to the blog, but didn't want to clutter things up with clunky posts. Now all I have to do is post screen-shots from the guides for easy reader clicking. Nice and simple, huh?

Please notice that you are welcome to leave comments and questions whenever you visit a zone-based Guide. I do pay attention, and always answer questions within a day or two. Hope to see you there!

 _______________________________________________

During the coming weeks, I'll add more Guides for helpful how-to information. Got a topic you'd like to see covered? If so, please leave a Comment here and I'll see what I can do.

You can see all of my current zones and guides on Helium.com by visiting my Zones home page.

Saturday, October 23, 2010

DIY Tile Pic of the Week: Tile Shower Base

By Jim Bessey, editor

When you want an all-tile shower enclosure, there's no substitute for the real thing and no shortcuts to great results. 

2 by 2 porcelain tiles imitating an earthy "wood" look make a great pattern
Most of our ceramic tile shower remodeling projects use some type of high-end precast base, rather than real tile as pictured here. Why? Because forming and installing a ceramic or porcelain tile shower base is a real pain in the behind. Not only that, it's very easy to make a crucial mistake that will be very difficult to address when the inevitable leak emerges days or weeks later.

On the other hand, none of those expensive cast bases can even attempt to imitate the beauty of an all-tile base. Unfortunately, the best way to achieve results like this uses methods alarmingly similar to those of the original Roman Spa builders. A good DIY tile project? Not really; but if you're patient and aren't afraid to work with water-proof membrane, mortar mix, thinset, and ceramic (or porcelain) tile -- well, it's a job you can do one step at a time, carefully. 

We'll talk about that process in a future column. I've included a number of more basic DIY Tile Tips in earlier posts.
 _______________________________________________


What tile projects have you tried? Your ideas for future posts and pictures are always welcome. For more tile information, see my DIY Tile Zone, hosted on Helium.

Sunday, July 18, 2010

DIY Kitchen Tile Backsplash: Good idea or bad idea?

Should you consider doing your own tile backsplash in the kitchen?

smaller tumbled marble tiles make a great backsplash
A recent online article offered this encouraging advice: DIY kitchen backsplash tile is an easy project you can do with basic tile tools.

Allow me to politely disagree.

Ceramic tile projects do have certain aspects that lend themselves to DIY efforts. Working with tile can be similar to playing with Lego blocks: you do it piece-by-piece and you can undo your mistakes easily, at first anyway.

On the other hand, errors left unfixed for more than a day or two are all but permanent. Furthermore, the tools you'll need for professional results almost always include a wet-saw -- not a 'basic tool' in my opinion. Why will you need a water-cooled tile saw? To cut around the inevitable electrical outlets above your counter-top. And let's face it, many DIY enthusiasts shy away from electrical work, with good reason.

Let's look at the cons of doing your own backsplash tile, first; then we'll consider tips for doing the project if you decide to go ahead.
  • Kitchen projects are highly visible, and the backsplash is at eye-level.
  • Laying out the tile pattern can be problematic.
  • As with all tile projects, surface preparation is critical to getting good results.
  • You'll be working over-top of a two-foot surface and beneath the overhead cabinets -- it's an awkward angle, at best.
  • The topmost row of tiles will almost always have to be cut to fit the upper cabinets.
  • Using thinset mortar around finished wood and polished counters can make a big mess.
  • You will have to work with and around electrical outlets and switches.
  • This all but requires using a wet-cutting tile saw.
  • Exposed ends will need proper finishing attention, or the project will look amateurish.
  • Grouting to the counter-top and up to the top cabinets isn't fun. Expert caulking is important.
Can a competent do-it-yourselfer overcome these drawbacks? Sure. Here are some tips specific to backsplash tile jobs, to help smooth the way.
  1. Choose your tile carefully, with a designer's eye to the relatively small space involved. Take some measurements, and look for tile sizes that might suit the numbers. In general, avoid choosing tiles larger than 8" square.
  2. With your counter-tops completely clear, protect the surface with paper or cardboard. For each wall area, physically lay-out the actual tiles. This will help you spot cutting problems at outlets, ends, and corners. Be sure to consider the spacing required for bull-nose edging tiles or other tile edging materials at every open end.
  3. Remove all remnants of wallpaper or loose paint. Repair any large gouges and smooth any existing rough surfaces, using plaster-based wall products, rather than vinyl joint compound. Consider priming the entire area for improved adhesion.
  4. If possible, use mastic adhesive or double-stick plastic sheets (at most big-box stores now), rather than thinset mortar. Less mess, and easier clean-up for both methods.
  5. Use full, uncut tiles as your first row (at the counter-top). To allow for an expansion joint, use strips of standard cardboard (not corrugated) between the top's surface and the bottom of that first row. Remove spacers before grouting.
  6. Rather than disconnecting outlets and switches, carefully pull each fixture out of its box (to at least 1/2" away from the wall surface), and use electrical tape to cover all exposed screw connections. For the safest approach, turn off ALL circuits involved until the electrical devices are safely taped.
  7. Can you avoid buying or renting a wet-saw? Yes, but the alternative involves using a diamond-coated grinding wheel and making a big dust mess -- not to mention the dangers to your fingers when cutting individual tiles. Your best bet is to place every uncut ("field") tile that you can -- first -- and then rent a professional tile-cutting saw for as little as a half-day. Be sure to follow ALL safety directions for using wet-saws.
  8. Use care when cutting around outlet openings, so that the new tile will support electrical devices at the new surface depth. You can re-install those fixtures before grouting, if desired. (Use masking tape to protect them during grouting.)
  9. Consider using a wood molding in place of any final, cut row of tiles just below the upper cabinets. If your last row would be 1 1/2" or smaller (fairly typical), this might even be your best option -- and it will save a lot of cutting, tricky/awkward grouting, and caulking.
  10. When you're ready to grout, be sure to follow the directions on the package; but tackle the job one area at a time, even if you have to make multiple batches of grout. Don't worry, as long as you keep using the same bag or box of dry grout, the grout color will remain reasonably consistent. You can easily clean grout that wanders onto adjacent surfaces in the first hour after application, so don't worry too much about the mess.
  11. After the grout has dried, carefully caulk the joint between counter-top and row one with a high-quality, silicone-based caulk. Use clear, translucent, or a color-matched product. Be sure to use the least amount possible, rather than trying to wipe big smears from finished surfaces.
These tips won't make the back-numbing angle of the job any better, but they will help you avoid other typical tile problems associated with backsplash installation. Most projects of this type can be completed in a single weekend. You'll save significant dollars versus contractor labor, and still achieve professional results. Don't forget to take before-and-after pictures!

copyright 2010 - reprints available upon request
 _______________________________________________
What tile problems have you encountered? Your ideas for future posts and pictures are always welcome. For more tile information, see my DIY Tile Zone, hosted on Helium. 

Thursday, June 17, 2010

How to install ceramic tiles next to other surfaces: comment and follow-up

What happens when ceramic tile meets carpet or hardwood?

ceramic tile uses metal edge transition to carpet
Today's design trends call for a mixture of flooring choices in our homes. This inevitably leads to tricky transitions between ceramic tile and other flooring materials. We began this discussion some weeks ago with this advice article:

How to install ceramic floor tiles next to wood flooring

Readers were quick to comment, probably because there is always more than one way to address these unlike-materials transitions.

Floor tiles guy said... Great article, it would be great to see a follow up article on advice with what to do when you are tiling from your kitchen up against a carpeted surface. Thanks 

Robert said...  Floor tiles are commonly used in home renovations today. Your post discussed the two possible scenarios when tiles are installed beside hardwood flooring. Among the two cases, the one with uneven levels is problematic. I agree with Floor tile guy that a follow up about repairs in those instances would be very useful to your readers.

In our case, spared us of such problems when we renovated our house. We have a maple hardwood flooring for the living area and used ceramic (Brandon) tiles for the kitchen. The floor looked neatly done because we had ample time to plan and discuss details like sub-floor foundation. In any case, a renovator must be very keen on details like measurements of the sub-floor and thickness of the tile to achieve a fairly even floor for his house. 


"Fairly even" is the key to making good tile transitions. Robert is exactly right.

The minimum recommended thickness for ceramic tile installation is about 5/8" -- and that's using a minimal 1/4" tile backer-board or the newer Ditra-brand substrates from Schluter. Fortunately, this thickness works well with most installed carpeting.  Typically, carpet plus padding adds up to about 5/8" -- although the type of carpet and the thickness of the selected pad can vary this measurement.

When tile and carpet are of nearly identical heights, you can use marble thresholds (bathroom) or simple square-finish tile edges. In both cases the carpet is stretched and tucked using the standard tackless strip. If the carpet is somewhat higher than tile, Schluter offers stepped edges to 'clamp down' thick carpeting.

Many times, however, porcelain tile installed over a thicker substrate like 1/2" Durock from USG will add up to a floor that's nearly one inch thick, not including the original house subfloor. That extra thickness puts the finish tile substantially higher than the nearby carpet. In this case, you have a couple of good choices:
  1. Use a "Hollywood" style marble threshold, which has a long bevel on one side to lead back down to carpet level. This works fine in a Master Bath off a carpeted bedroom, for instance.
  2. In high visibility common areas, a better choice would be a ramped metal Schluter edge (as mentioned in the original article about transitioning to hardwood floors). You could even consider a softer plastic-edge for a more subtle effect.
As Robert mentions, when you have time and opportunity to plan ahead, you can adjust all the flooring selections so that they'll add up to similar numbers. For stronger, modern subfloors you can use the thinner tile substrates to avoid high-tile problems.

Or, attacking the problem from the opposite direction, make the carpet thicker! It's easy and relatively inexpensive to add 1/4" to carpet thickness, merely by first installing basic luan underlayment before carpet is installed.

With tile transitions, as with so many things in life, the best answers usually come down to proper planning and preparation. Taking a little extra time to look ahead before you begin the installation -- and also to consider using specialty products designed for tricky situations -- can mean the difference between mediocre results and professional finishes.

copyright 2010 - all rights reserved * reprints upon request
 _______________________________________________
What tile problems have you encountered? Your ideas for future posts and pictures are always welcome. For more tile information, see my DIY Tile Zone, hosted on Helium. 
See the earlier article as it appears on Helium.com

Tuesday, June 08, 2010

Ceramic tile: Tips for choosing the right size for your project

It's just as true for tile: "size matters"

by Jim Bessey

tile tub surround uses four tile sizes for effect
how many tile sizes do you see here?*
What's more fun than doing a tile job? - choosing the tile!

Shopping at tile stores is a sensory experience. So many shapes, sizes, textures, patterns and colors to choose from; it's enough to make you dizzy. At first it's easy:

"Love that! Love those! No way I'd use them!" But then comes, "- oh, I like those, too. These would look great in our bathroom. So would these, over here."

And that's just in the first five minutes of browsing the tile displays. When you consider the combinations and permutations, there are actually more tile choices than there are paint colors at Sherwin-Williams. One way or another, you have to...

Narrow the field.

Most folks start with a color scheme and a budget. That cuts the possibilities by at least half. Still leaves a couple thousand potential selections. Move on to texture: smooth or "natural" surface? Glossy or matte finish? Now you're down to just a few hundred possible tiles.

Size matters... keep reading

copyright 2009 Jim Bessey - all rights reserved ~ Reprint rights available at Helium.com
_______________________________________________
This guide to choosing tile sizes for your DIY tile projects recently tied for second place in Challenge 21: Your best advice, hosted in Betaville on Helium.com. 
Your can find more tile advice from Jim and other Helium authors on the DIY Tile Zone, also hosted in Betaville. See this story as it appears on Helium.
If you have pictures of a recent DIY tile job you completed, contact me by Comment or email to share them here on K&B by D'Zyne.

* answer: there are four distinct tile sizes shown in the picture: 12x12, 6x6, 2x2, and 12" by 1" gold metallic 'rope' as an accent band edging. The tiles laid diagonally are the same 6x6's as in the horizontal row below the accent band.