Creating kitchens and baths for finicky customers since 1993


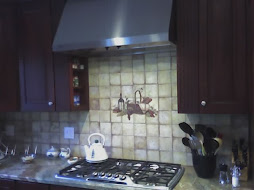
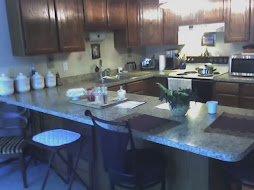
backsplash features inset metal tiles for accent and texture

Sunday, July 15, 2012

Fresh pictures posted on Featured Projects page -- your feedback welcome!


by Jim Bessey

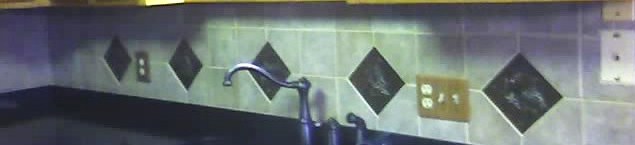
accent tiles in wall band and niche jazz up tan tile surround
This tan tile was almost boring -- until we added the accent tiles!
With a light rain falling this morning, today was a fine day for digging through my photo archives. I've been meaning to post new pictures on the Featured Projects page, but had kept being sidetracked by other, more pressing, deadlines.

Trouble is, even though I don't take dozens of pictures from each job, I've still accumulated hundreds of photos without any helpful organization. So I had to do some organizing. First I backed up a big batch of work pics, then I began slashing.

Two pics too similar? One of them had to go. Overexposed? Gone. Boring? Delete. I fixed and lightened and cropped and shuffled folders, renaming both folders and images so the names made sense--not just dates and job names.

While I was doing that, I put together three CD's with assorted images for Scott Bacon, at McKenna's Rochester Kitchen & Bath, the company I do remodeling work for. He's been polite about asking me for the past few weeks. Now I can finally hand him something useful.

So I've added a variety of interesting tile project pics to that long-neglected page, too, finally. I'll keep going, now that I can see what's what. Have a look, and if you see something you like (or hate?) please do leave a Comment here. Thanks!
_______________________________________________
If you have tile project pictures or helpful project advice you'd like to share, please leave a Comment here or contact me directly. ~Jim

Sunday, April 24, 2011

How we turned a bedroom closet into a powder room, for under $1,000

Have you ever tried to fit five people into one bathroom? When we bought our 1964-built ranch house in Fairport we knew it was only almost perfect. It was big enough, had a garage and walk-out part-finished basement, a lovely yard with gardens--but only one bathroom. That was fine when it was just the two of us here, but sure got crowded when Lin's daughter and my two sons were home, too.

Our tiny foyer Powder Room!
We needed a powder room. We three boys weren't willing to use the bushes in broad daylight or wintertime. Question was, where the heck could we shoehorn in that half-bath? Our house is small by today's spacious standards, at about 1100 square feet. We'd already turned one of the three bedrooms into our den. We didn't want to put a bathroom in the basement, unless there was no other choice.

Well, we had this "foyer"... That got us to thinking. It was part of the living room, and took up more space than needed. The tile there, one-inch white mosaic, was hideous. We had an entry closet and six feet of blank wall beside it. And what was on the other side of that blank wall? --a barely-used closet in our den. Light-bulb!

Great ideas come from 'give and take.' We realized we could give our den closet to the cause, and take some space from that over-sized foyer, add the two together, and have just enough room for a very handy little powder room. Fortunately, we also had access to the floor below, from the basement, for the plumbing. We did some checking, drew some sketches, and made the decision.

Step one was to fix the foyer footprint. For this, I had to go ahead and build the living-room-side walls of our future powder room, so the new entry tile would be the right shape. Building partition walls is easy enough, and not expensive (under $100). We even had an extra pre-hung door that was just the right size (free). For weeks, that was all we had--new foyer tile and a fake powder room (which we, of course, used as a temporary closet).
"Kids sure do love destroying things!"
Step two was to move our den-stuff out of that "extra" closet. Once it was empty, we could seal-off the closet doorway with plastic and bring in the big guns. We drafted my two boys to demolish the wall between the den closet and the fake foyer closet. Kids sure do love destroying things! They made a joyful mess, and that wall was gone in no time.

The boys helped me with construction, too. We turned the former closet doorway into the plumbing wall, which worked out well since I could put the studs where I wanted to. We set up for a new sink and toilet, made plumbing connections in the basement, added wiring for an outlet and light, and did some drywall work and trim to tie the whole thing together (under $200). My wife provided the layout and design direction.
Here's how we squeezed-in our new Powder Room
When we were done with that part, we had a room that was about 4 feet long and just over 3 feet wide--just barely big enough. The foyer door opened directly to the future sink, with the toilet tucked to the right. Before we could set those fixtures, though, we had to do the finish work. Lin did all the painting and I added ceramic tile on the floor and back wall. The tiles were left-overs; new paint was about $35 with supplies.

I had a one-piece sink-top and a decent toilet from previous jobs (free), saved for this occasion. We mounted the sink pedestal-style, which makes the room look bigger. We installed a recessed paper-holder for maximum leg-room by the toilet. It's a tight squeeze, but it all works fine. Lin found a beautiful framed mirror and ceiling-mounted light fixture (both used). We purchased a new towel-bar and glass shelf for over the toilet (appx. $40).

By the time we were ready to cut the ribbon on our new powder room, we'd spent about $500 outright, and made great use of stuff I'd had laying around--stuff you can find at yard sales or beside the road for next to nothing. I didn't add up our labor; but we can value it "under $500" as a reasonable guess. If you had to hire me to do all of this for you, we probably could triple that number. I'm glad we knew how to do this; otherwise I'd have been happy to spend the money!

The boys aren't here every weekend anymore; they're busy. And our daughter has a good job and her own place. We don't have to worry about five-in-the-house very often. But that little powder room gets used every single day. I can't even imagine doing without it again. It just might be the best small project we've ever done. 
_______________________________________________
One thing we figured out a bit later on: tiny bathrooms need ventilation! See the chimney chase on the drawing, above? We cut-in a natural "cold air return" there, and finally got some airflow in the room. My wife thanks me...
Wednesday, December 01, 2010

Here's how you can lay out tile like a professional - Part One

by Jim Bessey

"Proper prior planning prevents piss-poor performance" --common business adage

tricky bath floor tile layout
View from the doorway--a tricky bath tile layout!
Laying ceramic tile can be a good DIY project. However, before you lay a single tile you need a good tile layout. Some will say you can do this on graph paper. As a professional tile installer, I politely disagree. Paper layouts are no match for an empty room, properly prepared, and the real tiles scattered on the floor in front of you. Ever heard the saying, "proper prior preparation prevents project problems"? This counts double for laying tile.

The beauty of tile is that it's not a fragile sheet good, or a warpy wood product. You can 'play with it' like Lego, shuffling the pieces around until you have them just right. No cardboard templates are required, and you don't have to sort out the bad pieces (usually, anyway). Each tile will generally vary by no more than 1/32" - close enough to make tiles interchangeable.

Where should you start?
You don't want to get halfway through the job and find yourself two tiles short.
Make rough measurements first, on graph paper if you like, and be sure you have enough tile purchased to complete the job. Always allow no less than 10% for potential cuts and waste. You don't want to get halfway through the job and find yourself two tiles short. For one thing, you'll have a difficult time matching the tile lot for small quantities. Mixed-lot tiles can sometimes stand out as if they were a different color, so don't risk it.

Begin with an empty room, free of clutter and vacuumed clean. Typically, remove all existing baseboards. Same for adjacent hallways, if your tile will continue there, too. Have your backer board (or similar tile underlayment) ready and handy, but uninstalled. You'll want to be sure that backer joints and tile joints don't coincide. The only way to know this is by laying out your tile in advance. Decide your grout joint size based on personal preference, and have spacers available. These are cheap, and go a long way toward producing professional results...  keep reading

Reprinted from the original on Helium.com  copyright 2010 - Jim Bessey
. Read Jim's profile at Helium 
  _______________________________________________
See this story as it appears on Helium.com 
     For more How-To Guides, see our new How To page, hosted here.

Saturday, November 20, 2010

Toilet Repairs: How to fix a troublesome toilet

by Jim Bessey

Troubleshooting common toilet problems

Not a single fixture or appliance in our homes is more crucial to our sanity than the lowly toilet. We expect our commodes to work every time, and we cringe with foul distaste when one fails in its humble mission. Yet a malfunctioning toilet must be fixed post-haste! If the kitchen sink is clogged, that can wait. Not so the potty. And it's all so distasteful: it's damp, perhaps a bit moldy inside, fouled by unspeakable germs and vile gunk no human should touch. The thought of calling a plumber, however, conjures visions of an exorbitant and illegible bill for emergency service.

Here are three secrets, revealed: First, you probably can repair that mis-behaving toilet yourself. Second, toilets aren't nearly as complicated as you fear. And last, except in the case of a truly disturbing overflow of the bowl, your toilet is much cleaner than you might expect. On the other hand, your fears of a pricey service call are well-founded. It's not at all unusual to pay almost $200 for a plumber's visit. For about $50 more than that, you could have a new toilet installed. It's worth your time, worth overcoming your reluctance, to at least give it a look.

Anatomy of the common toilet (U.S. design, residential):

Bird's-eye toilet view
Starting at the top: THE TANK. Although there are endless variations in shape and size, every commode has a water reservoir, usually a separate tank that holds ordinary tap-water used for flushing. A pipe emerges from the wall or floor nearby; most often you'll find a shut-off valve (with a small handle of some sort), which leads fresh water through a supply tube up to the tank. [Some tanks are cast as a unit with the bowl. This is a designer trick which makes repairs and replacement deliberately more expensive.]

Below the tank: THE BOWL. This part of the commode holds a second reservoir of water, necessary for effective flushing and for sealing off the sewer line from the air in your home. Most of us believe the toilet bowl to be hopelessly contaminated with exotic microbes. Unless you never clean it, that simply isn't true. Your kitchen sink almost certainly harbors more hazardous germs, especially if you have a garbage disposal.

The bowl covers the critical DRAIN. This is an two- to four-inch opening in the floor, leading directly to your main sewer or septic line. A clogged drain line doesn't even involve the toilet fixture itself; the problem's in the pipes. If your trouble lies in the drain line beneath the floor, that's the right time to call a plumber.

Things that can go wrong, and can be fixed:

Your shut-off valve can become clogged over time. If the tank seems to take an eternity to fill, the valve may need replacement. There's a second shut-off inside the tank, too: the one that sometimes doesn't stop running after you flush. For most toilets, that part costs less than $20 to replace. A typical brand of tank-filler is "Fluid-Master," sold in every hardware store. If you can shut-down either your water main or the valve with the handle below the tank, then you can do this job yourself. Cures most slow-fill or won't-stop-running issues.

Sometimes the "flapper" fails to function. In this case, water continually seeps or gurgles into the bowl (possibly wasting hundreds of gallons a week). Jiggling the handle is a common short-term solution. However, while the flapper's design varies from brand to brand, most home-owners can handle replacing that part themselves. Turn off the toilet's water supply for this chore, too.

The most humbling and distasteful problems come when the drain becomes clogged. If your handy plunger fails to clear the clog, go ahead and call a plumber. You could try "snaking" the drain yourself, but that's not a job for the faint-of-heart. Clogged drains can usually be blamed on some variation of "too much toilet paper." Prevention, and education of blissfully ignorant family members, is the only way to avoid recurrence.

The critical point: try not to be afraid. It's only a toilet. You don't have to be a rocket scientist to show the commode who's boss.


  Reprinted from the original on Helium.com.   copyright 2010 - Jim Bessey 
Read Jim's profile at Helium.com 
_______________________________________________
See this story as it appears on Helium.com 
    For more How-To Guides, see our new How To page, hosted here.

Tuesday, November 09, 2010

New How-To Guides page added to Kitchens & Baths by D'Zyne blog

Added today: How to build a storage shed and How to install a GFCI receptacle.

Helium's How-To Guides zones page system offers pics, articles, and more!
Earlier this year, Blogger added a nice little Pages system that allows us to display stand-alone web pages within our blogs. I've wanted to add my recent How-To Guides to the blog, but didn't want to clutter things up with clunky posts. Now all I have to do is post screen-shots from the guides for easy reader clicking. Nice and simple, huh?

Please notice that you are welcome to leave comments and questions whenever you visit a zone-based Guide. I do pay attention, and always answer questions within a day or two. Hope to see you there!

 _______________________________________________

During the coming weeks, I'll add more Guides for helpful how-to information. Got a topic you'd like to see covered? If so, please leave a Comment here and I'll see what I can do.

You can see all of my current zones and guides on Helium.com by visiting my Zones home page.

Saturday, October 23, 2010

DIY Tile Pic of the Week: Tile Shower Base

By Jim Bessey, editor

When you want an all-tile shower enclosure, there's no substitute for the real thing and no shortcuts to great results. 

2 by 2 porcelain tiles imitating an earthy "wood" look make a great pattern
Most of our ceramic tile shower remodeling projects use some type of high-end precast base, rather than real tile as pictured here. Why? Because forming and installing a ceramic or porcelain tile shower base is a real pain in the behind. Not only that, it's very easy to make a crucial mistake that will be very difficult to address when the inevitable leak emerges days or weeks later.

On the other hand, none of those expensive cast bases can even attempt to imitate the beauty of an all-tile base. Unfortunately, the best way to achieve results like this uses methods alarmingly similar to those of the original Roman Spa builders. A good DIY tile project? Not really; but if you're patient and aren't afraid to work with water-proof membrane, mortar mix, thinset, and ceramic (or porcelain) tile -- well, it's a job you can do one step at a time, carefully. 

We'll talk about that process in a future column. I've included a number of more basic DIY Tile Tips in earlier posts.
 _______________________________________________


What tile projects have you tried? Your ideas for future posts and pictures are always welcome. For more tile information, see my DIY Tile Zone, hosted on Helium.