Creating kitchens and baths for finicky customers since 1993


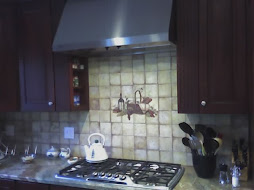
backsplash features inset metal tiles for accent and texture
Showing posts with label Kitchens. Show all posts

Sunday, July 18, 2010

DIY Kitchen Tile Backsplash: Good idea or bad idea?

Should you consider doing your own tile backsplash in the kitchen?

smaller tumbled marble tiles make a great backsplash
A recent online article offered this encouraging advice: DIY kitchen backsplash tile is an easy project you can do with basic tile tools.

Allow me to politely disagree.

Ceramic tile projects do have certain aspects that lend themselves to DIY efforts. Working with tile can be similar to playing with Lego blocks: you do it piece-by-piece and you can undo your mistakes easily, at first anyway.

On the other hand, errors left unfixed for more than a day or two are all but permanent. Furthermore, the tools you'll need for professional results almost always include a wet-saw -- not a 'basic tool' in my opinion. Why will you need a water-cooled tile saw? To cut around the inevitable electrical outlets above your counter-top. And let's face it, many DIY enthusiasts shy away from electrical work, with good reason.

Let's look at the cons of doing your own backsplash tile, first; then we'll consider tips for doing the project if you decide to go ahead.
  • Kitchen projects are highly visible, and the backsplash is at eye-level.
  • Laying out the tile pattern can be problematic.
  • As with all tile projects, surface preparation is critical to getting good results.
  • You'll be working over-top of a two-foot surface and beneath the overhead cabinets -- it's an awkward angle, at best.
  • The topmost row of tiles will almost always have to be cut to fit the upper cabinets.
  • Using thinset mortar around finished wood and polished counters can make a big mess.
  • You will have to work with and around electrical outlets and switches.
  • This all but requires using a wet-cutting tile saw.
  • Exposed ends will need proper finishing attention, or the project will look amateurish.
  • Grouting to the counter-top and up to the top cabinets isn't fun. Expert caulking is important.
Can a competent do-it-yourselfer overcome these drawbacks? Sure. Here are some tips specific to backsplash tile jobs, to help smooth the way.
  1. Choose your tile carefully, with a designer's eye to the relatively small space involved. Take some measurements, and look for tile sizes that might suit the numbers. In general, avoid choosing tiles larger than 8" square.
  2. With your counter-tops completely clear, protect the surface with paper or cardboard. For each wall area, physically lay-out the actual tiles. This will help you spot cutting problems at outlets, ends, and corners. Be sure to consider the spacing required for bull-nose edging tiles or other tile edging materials at every open end.
  3. Remove all remnants of wallpaper or loose paint. Repair any large gouges and smooth any existing rough surfaces, using plaster-based wall products, rather than vinyl joint compound. Consider priming the entire area for improved adhesion.
  4. If possible, use mastic adhesive or double-stick plastic sheets (at most big-box stores now), rather than thinset mortar. Less mess, and easier clean-up for both methods.
  5. Use full, uncut tiles as your first row (at the counter-top). To allow for an expansion joint, use strips of standard cardboard (not corrugated) between the top's surface and the bottom of that first row. Remove spacers before grouting.
  6. Rather than disconnecting outlets and switches, carefully pull each fixture out of its box (to at least 1/2" away from the wall surface), and use electrical tape to cover all exposed screw connections. For the safest approach, turn off ALL circuits involved until the electrical devices are safely taped.
  7. Can you avoid buying or renting a wet-saw? Yes, but the alternative involves using a diamond-coated grinding wheel and making a big dust mess -- not to mention the dangers to your fingers when cutting individual tiles. Your best bet is to place every uncut ("field") tile that you can -- first -- and then rent a professional tile-cutting saw for as little as a half-day. Be sure to follow ALL safety directions for using wet-saws.
  8. Use care when cutting around outlet openings, so that the new tile will support electrical devices at the new surface depth. You can re-install those fixtures before grouting, if desired. (Use masking tape to protect them during grouting.)
  9. Consider using a wood molding in place of any final, cut row of tiles just below the upper cabinets. If your last row would be 1 1/2" or smaller (fairly typical), this might even be your best option -- and it will save a lot of cutting, tricky/awkward grouting, and caulking.
  10. When you're ready to grout, be sure to follow the directions on the package; but tackle the job one area at a time, even if you have to make multiple batches of grout. Don't worry, as long as you keep using the same bag or box of dry grout, the grout color will remain reasonably consistent. You can easily clean grout that wanders onto adjacent surfaces in the first hour after application, so don't worry too much about the mess.
  11. After the grout has dried, carefully caulk the joint between counter-top and row one with a high-quality, silicone-based caulk. Use clear, translucent, or a color-matched product. Be sure to use the least amount possible, rather than trying to wipe big smears from finished surfaces.
These tips won't make the back-numbing angle of the job any better, but they will help you avoid other typical tile problems associated with backsplash installation. Most projects of this type can be completed in a single weekend. You'll save significant dollars versus contractor labor, and still achieve professional results. Don't forget to take before-and-after pictures!

copyright 2010 - reprints available upon request
 _______________________________________________
What tile problems have you encountered? Your ideas for future posts and pictures are always welcome. For more tile information, see my DIY Tile Zone, hosted on Helium. 

Saturday, February 13, 2010

Tumbled marble makes a magnificent backsplash tile choice

tumbled marble tile backsplash
Tumbled marble tiles, natural stone cut to 4" by 4" squares, pre-sealed for easy handling.

Henrietta NY: A kitchen customer recently updated her ugly old laminate counter tops to natural granite. She called us in to add the finishing touch -- a gorgeous tumbled marble backsplash. These little squares add a warm, distinctive look without any need for fancy borders or decorative inserts.

Tumbled marble is natural stone, cut to size and softened by abrasion. They are supplied pre-sealed for easier grouting and a longer-lasting luster. Every tile is distinct, though many are similar. Patterns emerge randomly, creating real eye-appeal effortlessly.

natural marble tile backsplashInstallation is a breeze, with careful layout preparation. We used the same tiles at the edges as for the rest of the field, simply choosing best-quality pieces for borders. Before beginning, we mixed all boxes randomly to ensure smooth blending. We used 3/16" spacing for sanded grout.

Marble tiles have to be cut with a diamond blade, typically water-cooled. These are fragile because of natural veins within the stone itself, so sometimes they just break. That's one of the reasons it's important to order a couple of extra square feet. We had THREE full tiles left over when we finished.

Our customer was thrilled with the finished product. She was concerned about blending granite and marble in the same space, and rightfully so. As you can see, each complements the other nicely. The two natural products provide a rich, yet earthy tone that doesn't overpower the room. This job took less than two full workdays, keeping the labor well under $1,000.

Reprints available on request.
_______________________________________________

For many homeowners, a tile backsplash makes a great DIY tile project. It's a small area, and one that doesn't disrupt your life the way a new floor might. Preparation for wall tiles is also less extensive than what's required for floors.

For more DIY tile information, please visit Jim's DIY Tile Zone hosted by Helium.com.

Saturday, September 12, 2009

Big tiles or small: which tiles are "just right" for your project?

What's more fun than doing a tile job? -- choosing the tile!

Shopping at tile stores is a sensory experience. So many shapes, sizes, textures, patterns and colors to choose from; it's enough to make you dizzy. At first it's easy:

"Love that! Love those! No way I'd use them!" But then comes, "-- oh, I like those, too. These would look great in our bathroom. So would these, over here."

6 x6 tile floor and white subway tile walls
And that's just in the first five minutes of browsing the tile displays. When you consider the combinations and permutations, there are actually more tile choices than there are paint colors at Sherwin-Williams. One way or another, you have to...

Narrow the field.

Most folks start with a color scheme and a budget. That cuts the possibilities by at least half. Still leaves a couple thousand potential selections. Move on to texture: smooth or "natural" surface? Glossy or matte finish? Now you're down to just a few hundred possible tiles.

Size matters.

Tiny, small, medium, large or giant -- which one feels just right to your eye? Many popular tile offerings are available in every size, from one-inch mosaics to 16" platters. That allows the tile manufacturer please a large range of customers. Let's ignore all those other options, and consider this question partly from the do-it-yourselfer's point of view.

Each tile size has a reason for its existence. Some trace their origins back to the Roman Baths and Ancient Greece. Other sizes were standardized during the post-war building boom. Still more were created to suit the appetites of modern mall builders, who wanted to cover larger areas with fewer tiles. The rest exist simply because they are aesthetically pleasing.

Here's the run-down:

  • Tiny tiles: Sheeted mosaics offer intriguing patterns of color and shape. They're easy to work with in most cases, because they require less difficult cutting. Typical sizes include one- and two-inch squares as well as similarly-sized octagons or hexagons. (The latter are more difficult to cut and fit.) Small tiles are often best for small spaces like kitchen counter top backsplashes or powder room floors, or for use as inset borders. In addition, web-mounted tiles allow the manufacturer to create intricate patterns that wouldn't work well with larger tiles.
  • "Subway tiles" (see photo) are usually glossy rectangles in a specific proportion: 2 to 1 or 3 to 1, as well as 5 to 3, are typical (but certainly not the only choices). These classic tiles make an elegant choice for traditional walls. Matching base coves, outside corners and edging ("bullnose") trims are usually available for each color and finish. Subway tiles are almost always ceramic -- lightweight, inexpensive, self-spacing, and easy to work with.
  • Until recently, builders have preferred ceramic squares in 4" or 6" sizes (see photo). They chose earth tones or elemental colors for more universal customer appeal. These "simple squares" are low-cost and easy to cut and install. They can be self-spacing or moved apart for larger grout lines, as desired. Generally, even non-stock colors can be ordered on short notice. Because the geometry is straight-forward, these tile sizes lend themselves to "checker-board" designs or "picture-framed" border layouts.
  • Larger rectangles offer a visual change-up from more familiar tile patterns. Standard sizes include 4 x 6, 6 x 8, and 8 x 10 (inches). These non-square tiles look great laid vertically, horizontally, and even in "brick"-style patterns. While ceramics are readily available, medium-sized tiles like this are more often displayed in porcelain lines. Porcelain tiles are heavier, more durable, less absorbent -- and harder to work with -- than standard ceramics. Installers will usually use tile spacers and cement-based "thin-set" mortar for best results.
  • Big tiles start at 12" square and go up from there. One popular size is 13.5" square, which probably converts to some whole number of centimeters. Paver-sized tiles were once reserved for large rooms, commanding foyers, malls, and restaurants. Now they are one of the top choices by designers for contemporary homes. Large and giant tiles are heavy, expensive, subject to shipping damage, and more difficult to install.
  • Preparation becomes critical as tile dimensions increase. DIY-level tile saws are often too small to accept these products for cutting. Layout can be tricky, to avoid weird edge-cuts and ungainly "L"s around corners. On the other hand, these (usually porcelain) tiles are incredibly durable, even for outdoor use. And they're gorgeous.
Which size is right for you? Consider room size, the level of complexity for layout (smaller tiles make layout easier, in general), and your skill level. In the end, your choice of tile size comes down to what "feels right" to you. Maybe you'll know it when you see it. When you consider all your options and choose the one that feels just right for you, you'll still be saying "I love it!" when the job is complete.

copyright 2009 - all rights reserved. Reprints available upon request.
_______________________________________________

For more information about tile floors and walls, have a look at the DIY Tile Zone in Betaville, at Helium.com. If you have questions or other feedback, please leave a comment here or on the tile zone.

Sunday, February 22, 2009

DIY Tile Pic of the Week: Cottage backsplash

Nostalgic cottage-style tile backsplash uses "subway" tiles and more:

 
cottage tile backsplash in white and tan

This week's project was one that could indeed be completed by a DIYer on a weekend. It's a classic cottage design using "subway" tile (note the offset layout) in two sizes and colors.

The tan tile in 5 by 5 squares forms a visual 5" backsplash. The same color is reflected in the top band (cut to size on site). These tan tiles ground the wall area and frame the off-white subway tile mid-section, creating a three-dimensional effect.

See the small inset tiles in beige? Those are pears, apples, and grapes. This adds to the texture and depth of the stove's backdrop. Using fruit, rather than a more abstract design, makes for a homey feel. This is Gramma's Kitchen, for sure. (Literally, in this case.)

Later, the homeowner will paint the surrounding cabinets using both colors from the tile to follow-through with this theme. Since both hues are neutral, all sorts of bright-color possibilities are open for accessorizing.

At just under thirteen square feet, this job budgets at well under $1,000 and is easily completed in less than ten hours total work time (one weekend is best). Tools required include a wetsaw (rental widely available), and the proper size trowel (per adhesive manufacturer's instructions).

Notice how the mixture of three different tile sizes really makes this difference in this small job?

DIY tile pic for week of Feb 22 2009

copyright 2009 - all rights reserved
_______________________________________________

See this photos like this featured along with all sorts of other related ceramic tile information and articles on the new DIY Tile Zone at Helium.com.

If you have a DIY tile pic that you'd like to share, please leave a Comment here. If I use your picture, I'll link to your blog or website. ~Jim

Thursday, November 13, 2008

Kitchens: A simple and elegant tile backsplash

ceramic tile backsplash with inset pewter diamonds
Our most recent ceramic tile backsplash project was modest, but lovely. This customer's small kitchen lent itself to elegant understatement. I think we achieved that result.

With many designers choosing "random" patterns, this one used more symmetry than usual. I'm a fan of balance and linear alignment, so I enjoyed making this design work out right.

We used a relatively inexpensive ceramic Florida Tile -- one that imitates a much pricier tumbled stone. Irregular edges are implied within the tile's varied surface patterns; yet the tile remains true-square, making it easy to set.

The insets you can see in the picture appear to be pewter (though I'm not certain what material is actually used). Each "diamond" is the same, with a simple geometric face pattern. Spacing and offset is identical, except at the stove. There's a single diamond that isn't centered between the junction of four tiles, placed instead in the center of two tiles stacked vertically. Can you spot it?

Both tile and grout used muted earth tones to provide the best backdrop for accessorizing. After this picture was taken, the homeowner repainted the walls, too, to better match this theme. All grout lines were protected with a spray-on grout sealer. This type of application uses volatile chemicals with a high evaporation rate (similar to laquer). The smell is dizzying at first, but outweighed by the extreme ease of application.

For the customer, a new ceramic tile backsplash like this adds beauty, value, and durability in the kitchen. As projects go, the cost is reasonable (depending upon tile selection) and not too intrusive. This backsplash took two days to complete.

copyright 2008 - all rights reserved
_______________________________________________

For a look at a similar project with a whole different look, and much bigger diamonds, see the photo at the top of the page.

Monday, August 18, 2008

We've been floored!

creepy old linoleum floor
What can you do with one of the most perfect weekends of the entire summer?

First you can work most of Saturday on an outdoor project (pictures coming soon). Then you can finish that project on Sunday morning. After that you can watch a bit of the NASCAR race (Carl Edwards swept the weekend), and then decide on a whim to go buy new laminate flooring for your kitchen. Yup, that's what we did.

There's no sense buying new flooring and then storing it in the garage, so we spent the evening installing it. Had my two best and favorite helpers along for the ride. We had fun, and transformed our ugly linoleum floor into a thing of beauty and luster in about five hours. See above for "before" and below for "after" pictures. We're so happy we finally got this done!

brand new laminate floor in cherry finish

That'll save about two thousand words...

PS: Want to see more pic's of our various home projects, and this year's "tropical" garden? Just click on the title of this article to navigate to more home photo's.