Creating kitchens and baths for finicky customers since 1993


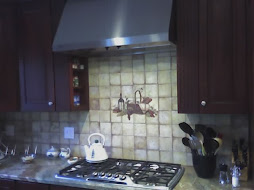
backsplash features inset metal tiles for accent and texture
Showing posts with label Carpentry. Show all posts

Monday, July 16, 2012

Rotted camper floor: Porcelain tile to the rescue


by Jim Bessey

Porcelain tile fixes rotten floor in our 1980 Shasta camp trailer
12" by 12" porcelain tile fixes rotten floor in our 1980 Shasta camping trailer 
I've done a lot of tile projects over the years -- it's my job. I started out with kitchen counter backsplashes, graduated to floors, and eventually learned to do tub and shower surrounds. After all of those jobs, however, I have to admit that fixing our aging camper's squishy floor was one of the most difficult. But it was also one of the most rewarding. That floor repair saved our camper.

When we bought our 1980 Shasta camper about 6 years ago, the floor just inside our door and into the bathroom had a "soft spot." I fixed that by doing some plywood patching, by adding floating laminate flooring in the main area, and by overlaying linoleum in the bathroom. Until last month, that was good enough.

When Lin and I went camping earlier in June, we discovered that the "soft spot" had returned with a vengeance. Afterward, I parked the camper in our driveway turn-around and set up shop. We had another camping trip coming right up, so I had to hustle. First I had to fix the steel fold-out step, which was very springy (that was a clue for me for what was to follow).
The extent of the rot made me sick
The floor problems began right inside the door, the single highest-traffic part of our camper. I knew some serious fixing was in order, so I put a new blade in my cordless sawz-all and started what I'd hoped would be a strategic surgery. No such luck.

The damage was horrendous: wet-rotted frame members, plywood so soft I could crush it in my hands. The extent of the rot made me sick. It went under the entry closet, over to the oven cabinet, and all the way to the bathtub. In all, I had to remove everything down to the protective metal under-skin for a total of over 15 square feet.

Even the wooden 2 by 2 framing was ruined, and that's what held everything together. (see diagram)

section view of Shasta camper floor construction
Section view of camper floor, from the door-side. Yellow area has been rebuilt
Talk about needing a Plan B! I had to search my shop for suitable materials and start improvising right away. Had to cut out the bottoms of the closet and the vanity, just to get access. I laid in strips of 5/8" floor decking to span the dead space over the black water tank. Had to locate the metal cross-members and screw that down to firm it up.

Next came a layer of 1 by 6 pine at right angles to the floor plywood, to tie things together and gain some strength (since I couldn't plywood the whole floor in one shot). Trouble was, the 1 by 6 material was too thick to go under the existing floor plywood--the old and new floors had to "interlock." So I had to switch to 7/16" plywood, slip it under the old floor where it was still good, then infill with 1/4" lauan plywood.

Doesn't that sound like fun? Took me an entire Saturday to do all that.

I used up all my 'scrap' material, two tubes of Liquid Nails, and had to make another run to Lowe's for more plywood. Ran out of screws; ran out of underlayment staples. Ran out of daylight, too.

The right trim and finish fixes everything

It all worked out in the end, though. The floor was oddly-built and ugly, but felt really solid underfoot. With another full day available to me, I set-up for tile cutting, grabbed two boxes of left-overs from the garage, and spent a few hours cutting and laying new 12 by 12 porcelain tiles. Trust me, there were some tricky cuts!

The right trim and finish fixes everything. I scrounged through all of my left-over shoe moldings, some newly-acquired scribe moldings that matched perfectly, and caulked all the grout joints with tile-industry caulk that would stay permanently flexible. I figured grout would just crumble and fall out once I got back on the road.

You be the judge. Take a close look at the picture above. It's nothing fancy, really; but I'm hoping this floor will last until we're ready to give up on our 30-year-old camping trailer. It survived our week-long camping trip very nicely.
 _______________________________________________
 How about you? What's the trickiest tile job you've ever done?

Sunday, April 24, 2011

How we turned a bedroom closet into a powder room, for under $1,000

Have you ever tried to fit five people into one bathroom? When we bought our 1964-built ranch house in Fairport we knew it was only almost perfect. It was big enough, had a garage and walk-out part-finished basement, a lovely yard with gardens--but only one bathroom. That was fine when it was just the two of us here, but sure got crowded when Lin's daughter and my two sons were home, too.

Our tiny foyer Powder Room!
We needed a powder room. We three boys weren't willing to use the bushes in broad daylight or wintertime. Question was, where the heck could we shoehorn in that half-bath? Our house is small by today's spacious standards, at about 1100 square feet. We'd already turned one of the three bedrooms into our den. We didn't want to put a bathroom in the basement, unless there was no other choice.

Well, we had this "foyer"... That got us to thinking. It was part of the living room, and took up more space than needed. The tile there, one-inch white mosaic, was hideous. We had an entry closet and six feet of blank wall beside it. And what was on the other side of that blank wall? --a barely-used closet in our den. Light-bulb!

Great ideas come from 'give and take.' We realized we could give our den closet to the cause, and take some space from that over-sized foyer, add the two together, and have just enough room for a very handy little powder room. Fortunately, we also had access to the floor below, from the basement, for the plumbing. We did some checking, drew some sketches, and made the decision.

Step one was to fix the foyer footprint. For this, I had to go ahead and build the living-room-side walls of our future powder room, so the new entry tile would be the right shape. Building partition walls is easy enough, and not expensive (under $100). We even had an extra pre-hung door that was just the right size (free). For weeks, that was all we had--new foyer tile and a fake powder room (which we, of course, used as a temporary closet).
"Kids sure do love destroying things!"
Step two was to move our den-stuff out of that "extra" closet. Once it was empty, we could seal-off the closet doorway with plastic and bring in the big guns. We drafted my two boys to demolish the wall between the den closet and the fake foyer closet. Kids sure do love destroying things! They made a joyful mess, and that wall was gone in no time.

The boys helped me with construction, too. We turned the former closet doorway into the plumbing wall, which worked out well since I could put the studs where I wanted to. We set up for a new sink and toilet, made plumbing connections in the basement, added wiring for an outlet and light, and did some drywall work and trim to tie the whole thing together (under $200). My wife provided the layout and design direction.
Here's how we squeezed-in our new Powder Room
When we were done with that part, we had a room that was about 4 feet long and just over 3 feet wide--just barely big enough. The foyer door opened directly to the future sink, with the toilet tucked to the right. Before we could set those fixtures, though, we had to do the finish work. Lin did all the painting and I added ceramic tile on the floor and back wall. The tiles were left-overs; new paint was about $35 with supplies.

I had a one-piece sink-top and a decent toilet from previous jobs (free), saved for this occasion. We mounted the sink pedestal-style, which makes the room look bigger. We installed a recessed paper-holder for maximum leg-room by the toilet. It's a tight squeeze, but it all works fine. Lin found a beautiful framed mirror and ceiling-mounted light fixture (both used). We purchased a new towel-bar and glass shelf for over the toilet (appx. $40).

By the time we were ready to cut the ribbon on our new powder room, we'd spent about $500 outright, and made great use of stuff I'd had laying around--stuff you can find at yard sales or beside the road for next to nothing. I didn't add up our labor; but we can value it "under $500" as a reasonable guess. If you had to hire me to do all of this for you, we probably could triple that number. I'm glad we knew how to do this; otherwise I'd have been happy to spend the money!

The boys aren't here every weekend anymore; they're busy. And our daughter has a good job and her own place. We don't have to worry about five-in-the-house very often. But that little powder room gets used every single day. I can't even imagine doing without it again. It just might be the best small project we've ever done. 
_______________________________________________
One thing we figured out a bit later on: tiny bathrooms need ventilation! See the chimney chase on the drawing, above? We cut-in a natural "cold air return" there, and finally got some airflow in the room. My wife thanks me...

Sunday, December 06, 2009

Raymond draws his own conclusions about retaining wall construction


Raymond and I have discussed some of the aspects of building retaining walls over the past few weeks. One important factor is making sure you've had enough rest to carry you through a physically-demanding project.

Raymond drew this graphic to illustrate his opinion on the subject.

Reprinted by permission from Raymond Alexander Kukkee. Read Raymond's profile at Helium.com

copyright 2009 - reprints available on request
_______________________________________________

For a fantastic, in-depth look at your retaining wall options, please visit Raymond Alexander Kukkee's Zone, Retaining walls and how to build them. Thanks to Raymond for this graphic.

Have you ever built a retaining wall of your own? Got pictures? Contact me here, to share them.

Saturday, November 28, 2009

How to build a retaining wall with railroad ties

raymonds rail ties retaining wall
Retaining walls are can be beautiful or utilitarian. Materials choice matters.

By Raymond Alexander Kukkee

It's bright and sunny outside, and time to cut the grass again. You cut the side yard first, perfectly and evenly with the mower, and then look at the long grass in the back yard with trepidation. It is lawn that is far too steep and the soil is precariously eroded from endless water runoff. It is impossible to cut the grass safely with a lawnmower, so you haul out the weed whacker and start giving the treacherous area a tedious, crude haircut one more time.

You know you need a retaining wall but have procrastinated in building one, for the cost of manufactured, interlocking concrete stones commonly used to construct retaining walls is too high for your budget..

How can you build an inexpensive retaining wall?
The answer may be to build a retaining wall with railroad ties.

Where can you get railway ties?

Railroad ties, also called cross ties, are creosoted or chemically treated timbers that have been historically used to lay railway track all the way across North America. The treated wood ties resist decay for years but are eventually replaced as a matter of safety. Replacement may be with new timbers or the increasingly common concrete rail bedding ties. The replacement program has left millions of used and unused railway ties, switch timbers, and other large creosoted timbers available for other purposes including landscaping.


To find a source of railway ties, ask at your local building supply, landscapers, building contractors, or your nearest rail yard.


* Incidentally, do NOT feel free to help yourself to piles of ties you may happen to see along the railway tracks. Trespassing on railway property is both illegal and dangerous.
Buy railway ties from reputable contractors that often have contracts to legally remove hundreds, even thousands of ties at once, and do stockpile them for sale. Expect to pay higher prices for better quality timbers...

Read the rest of Raymond's retaining wall article at Helium.com

copyright 2009 Raymond Alexander Kukkee - reprints available upon request
______________________________________________

For a fantastic, in-depth look at your retaining wall options, please visit Raymond Alexander Kukkee's Zone, Retaining walls and how to build them. Thanks to Raymond for the photo shown with this article.

See this article as it appears on Helium.com

Read our previous article about building concrete or cinder block retaining walls.

We're collecting pictures of retaining walls that failed. Got one? Leave a comment here, or reach me via email.

Thursday, September 24, 2009

Blending decks into yards and landscapes: Featured on NOVA Pros!

http://novapros.com/articles/featured/blending-decks-into-yards-and-landscapes/

The past twenty-five years has witnessed a phenomenal boom in the construction of big outdoor decks. Most of them are downright ugly. Many are unimaginative rectangles built with now-graying green lumber in a dull array of parallel lines. In an era of eight-foot privacy fences, plenty of homeowners don’t care how ordinary their backyard refuges might appear to the neighbors. Some of us, however, want to achieve a lovely flow from treated wood to lot-line woods, and wouldn’t dream of installing head-high solid blockades to hide our handiwork.

You can have your sprawling wooden deck, your table and chairs, the big umbrella, a giant $2,000 barbecue station, and even one of those hideous plastic weatherproof storage bins – you can have all this, and a beautiful backyard, too. Let the Jones’s next door stare all they want; theirs will be a look of admiration tinged with envy.


Shared via AddThis
_______________________________________________

See this story as it originally appeared on Helium.com

copyright 2008 - Jim Bessey

Saturday, June 06, 2009

Wooden planter set makes a fine deck accessory

two planters and a bench
Most decks are boring until you add some jazzy details. A pair of wooden planters with a connecting corner bench did the trick at my house.

My oldest son and I found ourselves with a free afternoon last year. We had a small stockpile of materials left over from a project my partner had done for one of his customers. I did some measuring and calculating, and we had enough for a small project.

We trekked off to our local Lowe's to buy two square plastic plant containers and a box of color-matched screws. When we returned, we assembled a few basic tools, drew up some very basic plans on graph paper, and went straight to work.

Now our plain-Jane deck has a nifty and practical corner. The hostas add a very nice touch of green, too. My wife likes the bench -- it's her favorite spot to set out her potted plants for sunning.

Want to build your own? Read more comprehensive instructions in my Helium article, "How to build a wooden planter." You can use the picture as a general guideline, too, of course.

copyright 2009 - all rights reserved    Read Jim's profile at Helium.com
_______________________________________________

Want to learn more? Head for Theresa and Raven's Container Gardening Zone to see a LOT more about turning your patio or deck into a paradise. 

If you have a project like this you'd like to share, please drop me a line.

Read about building planters on Helium.com

Monday, October 13, 2008

5 Tips for Organizing Your Tool Shed

Keeping your tool shed organized is one of life's baffling challenges.

this tool shed needs organizing! jcb 2008 An outbuilding for tool storage can quickly become an unmanageable shelter for all sorts of useless junk, unless you start out with a system. Two problems contribute to the ill-repute of tool sheds: (one) they are usually too far from your house for convenience, and (two) you often end up storing things away in a panic when bad weather descends unannounced.

Here are five tips for avoiding tool shed nightmares.

First, decide what belongs in your tool shed.

Is this building your lawn and landscape management center? Or is it your own private workshop? Make a decision, and banish all unrelated items from the premises. If your 20-horse John Deere lawn tractor lives inside, then keep your table saw somewhere else. If your shed houses clay pots, potting soil, peat moss, and garden implements then leave the skis, golf clubs, and bicycles in the garage or basement.

Second, un-clutter your tool shed's floor.

Stop thinking of the floor as a place to put "stuff." Things get wet and rusty down there, and then you trip on them and get angry and break valuable possessions. If you simply must store things on the floor, put them in cheap plastic bins and label them clearly. Then, when you need to move that junk just to get at the important things, it's easy. Not only that, you'll actually know what you have stored in there.

Third, add shelving right away.

Shelves make organizing and retrieving your tools and supplies easy, and they help keep the floor navigable (see previous tip). For damp sheds, choose easy-to-assemble plastic shelving. For heavy boxes of supplies or tools, choose metal shelf systems when moisture isn't a problem. If you're a bit handy, build in some wooden shelves for the most versatility. Make your shelves twice as strong as they need to be for the load you will place on them, and that whole ugly "sway-back" shelf syndrome won't be your undoing.

Four, use rafter storage carefully.

When you start loading up your little shed's rafters with boards and long tools and other junk, you are admitting that you really don't have enough room in there. Face it, things placed in the rafters often remain there undisturbed for years. They sit there getting moldy, gathering black dust and spiders, useless. Consider using hooks instead. Hang up tools or other items that you use MORE often, not less. They'll be at eye level and easy to find, and you'll soon learn which objects belong where. "Hey, who took my good garden rake?" You'll know it's missing because its customary spot will be empty and quickly noticed.

Five, and finally: keep your shed clean and ventilated.

If you've sensibly organized your gear, then a quick sprucing-up will be a breeze. If possible, add an outlet and lighting so you can run a shop-vac out there. The spiders won't like this approach, and you'll smile when you open the door to get inside. If you can add a small window for natural light and ventilation, even better.

Invite outside air inside by installing a couple vent grilles in the sidewalls, if a window isn't practical. Gable or ridge vents similar to the ones on your house can also be used to keep air flowing inside. Why does this matter? Because fresh air makes your shed a better place for you, and for all your valuable stuff.

It's all about your attitude, in the end. If you see your tool shed as a nice place to visit you'll take better care of it. Your things will be where you expect them to be, and you won't just toss junk in there hoping to "get back to it later." One final thought: put a good lock on the door. No sense inviting burglars into your little sanctuary, after all your hard work.

copyright 2008 - all rights reserved
_______________________________________________

See this story as it appears on Helium.com

Saturday, August 30, 2008

Our very own Extreme Garage Makeover

- or, oh how I wish I'd taken some "before" pictures!


Picture if you will, a garage, filled with the accumulation of over one year's gathering of "stuff." A garage so crowded with assorted useful debris that only a four-foot walkway remains. And picture yours truly, the homeowner, arriving at his castle after a hard day's work filled with dread at the prospect of seeing the sorry state of his own garage.

Most workdays I need to swap one set of tools for another, or find a place to park some materials for the next day's job or a future project. The degree of disorganization that greeted me each night had reach depressing proportions. Something had to be done. What better way to spend the first perfect day of summer's final weekend?

I drafted my eldest son for this overwhelming task. We started with a trip to Lowe's for supplies and picked up various sizes of potential shelving for our attack on garage clutter. I'd hoped to buy a new set of front-loading bins for our recyclables, but we couldn't find a single one there. Home Depot has them, but we were already at Lowe's and the clock was ticking on our workday. We paid for our shelving and drove home to dig in.

We began, of course, by dragging almost all the junk I'd stacked in the garage out into the driveway. This process filled the space of three large vehicles. Both of us uttered various sighs of concern at the size of the job ahead. It was hard to figure out where to begin.

In the end we discarded one extra trashcan, one large bookcase, two perfectly good porcelain sinks, one fishing pole, two very large boards, and an entire trash-tote full of assorted worthless junk. For about an hour there was actually room in our garage to park a normal-sized car (not our goal). We assessed our shelving purchases and set-up shop.

garage makeover adds new shelves and cabinats

In the pictures you can see the two new cabinet shelf pieces we created. The one on the right is for ceramic tile and related supplies. The one in the back left corner is for "other stuff" and isn't even close to full! We also moved the oak base cabinet seen on the left wall -- it used to be buried under the front workbench. We gained about twenty square feet of work surface and found good spaces for everything that wasn't headed to the dump.


workshop view of garage makeover and new cabinet

Will another year's pack-ratting result in the same gloomy situation that we just corrected? I hope not. My real goal is to make decisions about which items will actually get used, and which should be given away or trashed. Some of what's stored in our garage is slated for exisiting to-do list projects. At least now I know what we have and where it is. I just might check-off a couple more lines on that list after all.

Tuesday, August 26, 2008

Using the vanity-stretcher to update a bathroom

white vanity grows 4 inches taller!
Remember back in the olden days, when we were all shorter? Ever get a kink in your back from bending over to use one of those too-low bathroom vanities? That was today's customer's problem, and I helped fix it without replacing her existing vanity.

With a couple hours' carpentry and less than $100 in materials, plus one new fancy vanity top, we've saved our customer's back and updated her bathroom dramatically in one quick makeover. Did you spot the fact that this vanity has been modified before your read this text?

I showed my wife this picture earlier, and she said, "that'll work fine for ours, too. When can you get that done?" (She smiled while she said it.) Seriously, though, it's a very handy and affordable bathroom trick! The second vantiy is shown below. That oak strip you see just beneath the new top was an ordinary hunk of oak from Home Depot, cut and stained on the job site.

oak vanity grows three inches taller

Saturday, August 23, 2008

Extreme Home Make-over day 2

Loading up trusses for new Extreme Home
Day Two for Extreme Home Make-over in Geneva. Work continues as the new Hill house takes shape. Orange shirts are crew members for the general contractor, and blue shirts are TV Network staff and volunteers.

The house is well underway, with trusses headed for the roof via on huge crane, and landscapers racing around filling in and fixing up. The crowd is bigger, too! Luckily for the work crew, the weather is as close to perfect as it gets in Western NY. They'll work three shifts through the nights, with caterers feeding 250 staffers at a seating, several times each day. Can you even imagine the logistics of this operation?
Extreme Makeover house takes shape
Click the title link above to view the complete Web Album from Google
Posted by Picasa

Thursday, August 21, 2008

Extreme Make-over: Home Edition visits Geneva, NY

Extreme Home Makeover crane awaits orders
Geneva, NY: ABC's Extreme Make-over: Home Edition crew arrives to begin work on the Hill family's new home. During the five days left for construction following Wednesday morning's demolition, the team will draw from a pool of several thousand volunteers to complete a 3,200 square-foot home and 2,800 square-foot barn. The Reveal is set for Monday, August 25 at 2 pm, EDT.

Geneva sits at the head of Seneca Lake, in the Finger Lakes, just thirty-some miles south of our home in Fairport, so we raced over to join the crowds on Wednesday afternoon. The construction group has commandeered several homes surrounding the site, as well as a funeral home parking lot and a second city lot for staging vehicles and materials. Two city blocks are closed completely to traffic.

Extreme Home Makeover crowd near caterer's tent

Work began first on the outbuilding situated behind the new residence. We could see two or three tall walls behind the giant excavator that was scooping out the house's basement. We gathered with a few hundred other onlookers behind the famous barricades set up across the street from the work site. On the day of The Reveal, cameras will show the huge crowd occupying that same area, before panning to a shot of "the bus." After that, Ty Pennington will utter his famous line, "Bus driver, move that bus!"

Click the title link for all Day One pictures on Google.

Monday, August 18, 2008

We've been floored!

creepy old linoleum floor
What can you do with one of the most perfect weekends of the entire summer?

First you can work most of Saturday on an outdoor project (pictures coming soon). Then you can finish that project on Sunday morning. After that you can watch a bit of the NASCAR race (Carl Edwards swept the weekend), and then decide on a whim to go buy new laminate flooring for your kitchen. Yup, that's what we did.

There's no sense buying new flooring and then storing it in the garage, so we spent the evening installing it. Had my two best and favorite helpers along for the ride. We had fun, and transformed our ugly linoleum floor into a thing of beauty and luster in about five hours. See above for "before" and below for "after" pictures. We're so happy we finally got this done!

brand new laminate floor in cherry finish

That'll save about two thousand words...

PS: Want to see more pic's of our various home projects, and this year's "tropical" garden? Just click on the title of this article to navigate to more home photo's.

Sunday, November 11, 2007

So you want to build a shed...

Your closets are overflowing. The basement is a rec-room and office. You don't have an attic, and there's no room in the garage for your car. Sounds like you need a shed! Maybe you could build your own. Storage buildings aren't nearly as demanding as kitchen make-overs, and you won't have to suffer weeks of eating take-out if your project enounters unexpected delays. Let's take a look at your options.

PURPOSE: How would having a shed help you? What would you be able to store in there? Decide in advance what "stuff" can be safely moved to an outbuilding. You'll have different requirements for storing bikes and golf-clubs versus lawnmowers and garden tools. Most home-owners will limit themselves to just one shed, so size and access certainly matters.

SITE: Should you keep it close to the house, or off in a distant corner? Will your neighbors object? Give location some thought before you make this decision. A roomy flat spot in the yard is ideal, but don't forget to consider lawn-drenching spring rains or devastating blizzard winds, for instance. Will your new building be pretty enough to stand proudly near your property line? You might be better served if you can add storage closer to a back or side entrance. Check with your local planning & zoning office about setbacks and regulations before you commit to anything. You might need a permit, or even board approval.

SIZE AND BUDGET: Anything you build on land can be priced by the square foot. Sheds are no exception. Just like car tires, the bigger they are the more they cost. Eight-feet-square can be plenty when you don't need to park a big riding lawn mower inside. If you do need room for your new John Deere, though, then twelve-by-twelve isn't unreasonable. The smaller size might be built for less than a thousand dollars; the bigger one could easily cost twice that much.

MATERIALS: Want your new shed to look like your house? Maybe "keep it simple" is your motto. Or maybe this is your one chance to be creative. Metal walls and roof are usually economy options. Modern wafer-board (now called OSB), painted and trimmed in pine, is a popular choice. Most people prefer regular shingles on the roof: they're inexpensive and not too tough to install. With a little knowledge and a couple extra tools, you can wrap your building with vinyl siding. Lots of sheds feature a type of plywood called Texture 1-11: it's got grooves spaced eight inches apart with a showy woodgrain suitable for staining. Those are just a sample of popular choices.

FLOOR: For parking the garden tractor you might choose a bed of gravel. Purists insist upon a solid layer of concrete, but that's the most expensive option and usually requires a building permit. You might decide to compromise by assembling a wood-frame floor: use pressure-treated lumber and minimum 5/8" plywood. The advantage of wood floors (aside from lower cost and easier construction) is the ability to level the floor on an uneven site. Disadvantage: bugs and some rodents just love the open spaces hidden underneath. Wood floors usually need some sort of ramp for easy access, too.

DOORS: You can use a regular entrance door and lock-set. You can build your own double-doors using plywood and pine trim with some back-bracing. You could even install a miniature overhead door, especially if your garden tractor is a big one! (That might be a job for a professional, though - and a bit pricey.) Consider adding a window or two, as well, for ventilation, light, and decoration. All sheds need some sort of airflow, or they get hot and musty over time.

DESIGN: You don't need to re-invent the wheel, or hire an architect. Every home center offers books of plans and materials lists. The fancier plan-books may cost ten dollars or more, but you'll have nice color pictures and detailed instructions to help make your project go easier. Your toughest decision will probably center on the roof-line. Gable roofs look great but require some skill, while salt-box and "shed"-style roofs simplify construction. Gambrel designs (think "big red barn") have been popular, but cutting and fitting the rafters can be tricky.

CONSTRUCTION: It's only a shed. You'll need bottom plates or a floor (treated lumber). Then you'll need four walls with an opening or two. If you can cut a board to proper length and hammer a few dozen nails in straight, then you can frame-up walls. Almost all shed designs offer you the option to install your sidewall materials while the wall lays flat on the ground. You have to be very careful to square-up your walls when you build that way. Measure diagonally corner-to-corner: when both diagonals are equal, then your wall is square and ready for siding. Don't forget to account for overlapping where two walls form a corner. You'll probably add pine trim on the corners after you stand-up the walls.

Installing the roof calls for caution and finesse. Your rafters may need specific angles and precise dimensions. Plenty of perfectly-handy home-owners end up buying pre-cut shed kits just so the roof components will arrive ready to assemble. Unless you buy a completed building, however, you will have to climb up on ladders to install the roof sheeting. That's the time to recruit a helper; the job's much too annoying to handle alone. On the other hand, putting the shingles on top is easier than you might think. (They even come with the instructions printed on the wrapper!)

Once the roof is done, you can add your door(s) and window(s). You'll need a level and a few screws or nails, and some sort of lock-set or hardware. Nothing you can't handle. Once again, these items arrive with printed instructions attached, just to make your life easier! You may want to add some shelving inside, too - depends on what you're going to store in there.
PAINT: Or stain, unless you've decided on vinyl siding (or something similar). When the hammering's complete, be sure to go ahead and apply a weather-proof finish. Don't let rain or sun or insects ruin all your hard work. Even a couple of weeks' delay could be disastrous. Just do it now, so you can move your stuff in right away.

Building your own shed is a wonderful project, and the whole family can help you do it. When it's done, you can proudly point to it and say: "I built that!". You'll also have saved yourself at least a few hundred bucks on the labor. Then you can go out and buy some more stuff to put in the garage! Have fun, and don't forget to take pictures.

copyright 2007 - all rights reserved

Saturday, November 10, 2007

Extreme Make-Over, Stairs Edition

from the road I finally bought a digital camera, by accident: it came inside my new phone. Now I can post simple descriptions of interesting jobs we've done, and let the pictures do most of the talking. This job was a tricky one, a referral from a friend who specializes in new flooring. He was smart to hand it off, but he did miss out on all the fun! Here's my view from the driveway, approaching my new customer's house.


before constructionThe new owner of this lovely home, Roman Jones (not his real name), made a dreadful discovery after he bought the place. When he removed the unwanted carpeting from his foyer staircase, he found the treads underneath were made of particle board. He thought they were hardwood, like all the rest of the floors downstairs. That's when Roman called my flooring friend and asked him to quote an extreme make-over, staircase edition. Mike, the floor-guy, considered replacing all the old particle board treads with new maple treads. That would have been a lot easier than what we ended up doing, but it also would have created some structural issues. This staircase was built in a factory, as a unit. In my opinion, tearing the treads out could have weakened the whole stair system. Since I have to offer a warranty on whatever work I perform, I decided to seek advice from people who build stairs for a living.

The solution, after a couple of consults, was to cover the old treads with new solid-maple treads and nosings. These specialty parts were created from maple planks by Steve, at Pittsford Lumber Co. in upstate NY. The rest was up to us, to assemble thein progress pieces on site. That involved a great deal of careful measuring and sanding. (Notice the tarping in the next photo.) Here's a shot of the job, in progress, with spindles removed and ready for surgery on the existing stair-treads. My partner, another Mike, and I cut all the original particle board overhangs off. This part of the job created tons of dust and debris, and called for all sorts of violent tools. We used a power saw, jigsaw, handsaw, chisels, and both belt-sander and cordless router. Not to mention the mighty shop-vac, which probably ran more than any other single tool.


new maple treadsThe carpentry work itself (the fun part) involved a fairly intricate mating of quarter-inch solid tread material with the front and side nosings. We devoured two bottles of wood glue and several dozen strategically-placed pin-nails (air-driven). At this stage of the project, my heavy Porter-Cable belt sander made everything come together. We added some maple-formula wood filler as needed. Sanding progressed from 120-grit belts to 220-grit detail pads. Once again, the shop-vac racked up the most hours! (But the tarps worked -- very little dust reached the adjoining rooms.)


All together, the work spanned ten days (about sixty man-hours). Making all that carpentry look pretty called for the services of my previously-unused cordless "mouse" sander, and quite a few sheets of 220-grit paper. Maple requires pre-treatment, finished in style!but looks best without any color added. We used a fast-drying polyurethane finish: two coats, sanded between, applied with a bristle brush. I checked Minwax.com first, and noticed they advised against using the popular foam brushes for this product -- too many bubbles. I have to admit, the results were pretty spectacular. I'm not much of a finisher; I prefer cutting, gluing, and nailing to brushing. By the time I enlisted my oldest son's help to re-install the original spindles (final photo), this refurbished staircase looked like a million bucks. The home-owner will paint the risers and stringers white, to complete the new look. I'm proud to say, "I built that"!

Friday, August 17, 2007

Balcony deck: We add a pergola!


Had a day "off" with some help from my brother-in-law, so we zoomed over to Home Depot, bought some materials, and built a pergola for my backyard balcony deck. "This changes everything!"
Posted by Picasa