Creating kitchens and baths for finicky customers since 1993


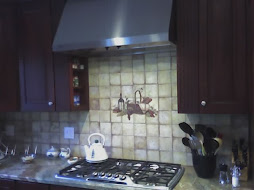
backsplash features inset metal tiles for accent and texture

Sunday, July 29, 2012

How to replace a damaged ceramic tile


by Raymond Alexander Kukkee, author of Incoming BYTES

broken floor tile
Good thing this tile's broken -- it doesn't match!
Ceramic tile is wonderful. Easy to clean, sparkling new ceramic tile floors in kitchen or bath start out as one of the most magnificent, fashionable, and durable flooring options available.

If properly installed, well-chosen ceramic tiles offer a lifetime, ultimate flooring experience for the homeowner. Like any flooring product, it is also subject to damage.

With an incredibly hard, durable surface, good quality ceramic tile may appear to be invincible. It is not. Damage can be inflicted on tile by even seemingly minor impact. Dropping a hard-edged object on a ceramic floor, whether it be a tool, a porcelain dinner-plate or your most prized coffee mug, can be disastrous.  Impact with equally hard or sharp objects inevitably marks the surface of ceramic.

With ceramic tile of lower quality, the colored surface glaze can be easily chipped off. 

Damage observed from minor impact will usually take the form of chip defects, and severe impact can result in a deeply shattered area. Cracking with no removal of ceramic can occur if the object dropped was only heavy, as opposed to hard or sharp. Ceramic tile lacks flexibility, so cracking can easily occur under pressure if the substrate is too flexible.

Regardless of how the tile was damaged, you can return your floor to pristine condition. With some basic tools, a homeowner with moderate DIY skills can remove a tile, replace it, and if the tile is matched well and the installation done carefully, the floor will be restored to perfection.

You will need:
  • a matching tile
  • hammer
  • cold chisel
  • a notched trowel
  • thin-set mortar
  • matching grout
  • safety glasses and gloves
  • miscellaneous tools normally found in the DIY toolbox. 
Remove the damaged tile

To remove a damaged tile, it is important to first assess the damage. If the tile is merely cracked from flexing of the substrate, lack of thin-set, or poor installation -- but the tile is still held tightly in place -- the removal process is different by necessity.

Unless the tile or broken sections can be immediately lifted out, the grout around the tile should be removed. To completely remove the grout use a 'grout saw' (a small hand tool with a notched blade), an oscillating-bladed Dremel-type power tool designed for this, or simply use an old flat-blade screwdriver. Grout is a cement-like material and will chip out quite easily.

Start removing the tile pieces carefully, and avoid the natural urge to pry out the tile pieces by attempting to pry them loose using the adjacent tile as a leverage point. Doing so can easily result in damaging the edges of otherwise perfect tiles, or loosen the adjacent tiles, resulting in extra work.

 For the alternative -- tool removal of grout, carefully scratch a small hole in the grout line, then hold the screwdriver vertically in the grout line and tap it along the grout line with a small hammer, loosening the grout carefully as you go.

If there are cracks in the tile surface but the tile is still tightly held in place, extra caution is required.

It will be necessary to break into the surface of the tile. Don't just smash the damaged tile with hard hammer blows. Why? Even if caused by impact, cracks in ceramic tile are the result of  flexing of the ceramic, however instantaneous. If the substrate is too flexible, a hard hammer blow can easily loosen adjacent tiles.

Break into the surface of ceramic by using a small carbide drill bit, carefully drilling several holes arranged to allow the breakout of enough material to allow the insertion of a small cold chisel or suitable tool to pry out the first tile fragment. Remove the broken tile pieces by working toward the grout lines.

Cleanup and preparation 

Remove all of the old thin-set, grout, or mastic adhesive as necessary to clean the substrate, and use a vacuum to remove all dust.

Test the replacement tile to ensure the correct or most attractive orientation if there is any pattern or color shading in the tile. It can be helpful to put an orientation mark on the new tile and corresponding marks on the floor in pencil to prevent last-minute error in tile orientation.

Install the new tile  

For accurate spacing and uniform grout lines, so you will need a few correctly-sized spacers -- or improvise.  Mix up some thin-set, and apply it on the substrate uniformly using your notched trowel.

Setting the tile in place carefully, tap or press it down, ensuring it is level with the adjacent tiles. Using a straightedge or level across the new tile in more than one direction can be helpful. If the tile is too low, remove it and apply more thin-set as necessary to reset the tile to the correct level.

Last-minute check -- ensure the grout line spacing is uniform. Adjust it carefully if necessary, and allow the tile to set for 24 hours before applying new color-matched grout. Let's not forget to seal the grout after it sets, too. Consider sealing the grout lines on a larger area to make the new grout less apparent.

Other problems encountered

Think safety. Please use all available safety protocol including safety glasses and gloves while hammering, chipping or drilling ceramic tile. Ceramic tile shards can be incredibly sharp.

What can we do if it is impossible to find a perfectly matching tile?

With older installations, that can be problematic. Think creatively. Several options include:
  • Search recycling stores. Outlets like Habitat for Humanity's 'ReStore' often have miscellaneous, older tiles in stock.
  • Consider replacing more than one tile in a square or rectangle, as a design accent.
  • Remove a single row of tiles, replacing them with suitably-colored tiles or a differently-textured tile to develop an inferred, partial pattern.
  • Remove several tiles diagonally, for the same purpose.
  • Remove every second tile in the row, replacing them with suitable accent tiles. 
  • If that seems like too much work, replace the broken tile with one high-quality, high-contrast tile that is a very visible, highly patterned or a complimentary color. Smile wisely and call it a conversation piece!
    If you use the latter approach, buy several tiles at the same time for future replacements, and as wished, place additional conversation pieces.

Before you know it, the floor will again be in perfect condition, even if it offers a slightly different visual effect. Bottom line, you can replace that broken tile.

You may like the new look so much you may even choose to break a few selected tiles on purpose.

Reprints of Raymond's article only with attribution, please
_______________________________________________ 
Or not! ~Jim
Be sure to visit Raymond's delightful and often thought-provoking blog, Incoming BYTES. Kukkee writes knowledgeably on many construction-related topics. He's a repeat contributor to this blog, too.

Monday, July 16, 2012

Rotted camper floor: Porcelain tile to the rescue


by Jim Bessey

Porcelain tile fixes rotten floor in our 1980 Shasta camp trailer
12" by 12" porcelain tile fixes rotten floor in our 1980 Shasta camping trailer 
I've done a lot of tile projects over the years -- it's my job. I started out with kitchen counter backsplashes, graduated to floors, and eventually learned to do tub and shower surrounds. After all of those jobs, however, I have to admit that fixing our aging camper's squishy floor was one of the most difficult. But it was also one of the most rewarding. That floor repair saved our camper.

When we bought our 1980 Shasta camper about 6 years ago, the floor just inside our door and into the bathroom had a "soft spot." I fixed that by doing some plywood patching, by adding floating laminate flooring in the main area, and by overlaying linoleum in the bathroom. Until last month, that was good enough.

When Lin and I went camping earlier in June, we discovered that the "soft spot" had returned with a vengeance. Afterward, I parked the camper in our driveway turn-around and set up shop. We had another camping trip coming right up, so I had to hustle. First I had to fix the steel fold-out step, which was very springy (that was a clue for me for what was to follow).
The extent of the rot made me sick
The floor problems began right inside the door, the single highest-traffic part of our camper. I knew some serious fixing was in order, so I put a new blade in my cordless sawz-all and started what I'd hoped would be a strategic surgery. No such luck.

The damage was horrendous: wet-rotted frame members, plywood so soft I could crush it in my hands. The extent of the rot made me sick. It went under the entry closet, over to the oven cabinet, and all the way to the bathtub. In all, I had to remove everything down to the protective metal under-skin for a total of over 15 square feet.

Even the wooden 2 by 2 framing was ruined, and that's what held everything together. (see diagram)

section view of Shasta camper floor construction
Section view of camper floor, from the door-side. Yellow area has been rebuilt
Talk about needing a Plan B! I had to search my shop for suitable materials and start improvising right away. Had to cut out the bottoms of the closet and the vanity, just to get access. I laid in strips of 5/8" floor decking to span the dead space over the black water tank. Had to locate the metal cross-members and screw that down to firm it up.

Next came a layer of 1 by 6 pine at right angles to the floor plywood, to tie things together and gain some strength (since I couldn't plywood the whole floor in one shot). Trouble was, the 1 by 6 material was too thick to go under the existing floor plywood--the old and new floors had to "interlock." So I had to switch to 7/16" plywood, slip it under the old floor where it was still good, then infill with 1/4" lauan plywood.

Doesn't that sound like fun? Took me an entire Saturday to do all that.

I used up all my 'scrap' material, two tubes of Liquid Nails, and had to make another run to Lowe's for more plywood. Ran out of screws; ran out of underlayment staples. Ran out of daylight, too.

The right trim and finish fixes everything

It all worked out in the end, though. The floor was oddly-built and ugly, but felt really solid underfoot. With another full day available to me, I set-up for tile cutting, grabbed two boxes of left-overs from the garage, and spent a few hours cutting and laying new 12 by 12 porcelain tiles. Trust me, there were some tricky cuts!

The right trim and finish fixes everything. I scrounged through all of my left-over shoe moldings, some newly-acquired scribe moldings that matched perfectly, and caulked all the grout joints with tile-industry caulk that would stay permanently flexible. I figured grout would just crumble and fall out once I got back on the road.

You be the judge. Take a close look at the picture above. It's nothing fancy, really; but I'm hoping this floor will last until we're ready to give up on our 30-year-old camping trailer. It survived our week-long camping trip very nicely.
 _______________________________________________
 How about you? What's the trickiest tile job you've ever done?

Sunday, July 15, 2012

Fresh pictures posted on Featured Projects page -- your feedback welcome!


by Jim Bessey

accent tiles in wall band and niche jazz up tan tile surround
This tan tile was almost boring -- until we added the accent tiles!
With a light rain falling this morning, today was a fine day for digging through my photo archives. I've been meaning to post new pictures on the Featured Projects page, but had kept being sidetracked by other, more pressing, deadlines.

Trouble is, even though I don't take dozens of pictures from each job, I've still accumulated hundreds of photos without any helpful organization. So I had to do some organizing. First I backed up a big batch of work pics, then I began slashing.

Two pics too similar? One of them had to go. Overexposed? Gone. Boring? Delete. I fixed and lightened and cropped and shuffled folders, renaming both folders and images so the names made sense--not just dates and job names.

While I was doing that, I put together three CD's with assorted images for Scott Bacon, at McKenna's Rochester Kitchen & Bath, the company I do remodeling work for. He's been polite about asking me for the past few weeks. Now I can finally hand him something useful.

So I've added a variety of interesting tile project pics to that long-neglected page, too, finally. I'll keep going, now that I can see what's what. Have a look, and if you see something you like (or hate?) please do leave a Comment here. Thanks!
_______________________________________________
If you have tile project pictures or helpful project advice you'd like to share, please leave a Comment here or contact me directly. ~Jim

Sunday, April 24, 2011

How we turned a bedroom closet into a powder room, for under $1,000

Have you ever tried to fit five people into one bathroom? When we bought our 1964-built ranch house in Fairport we knew it was only almost perfect. It was big enough, had a garage and walk-out part-finished basement, a lovely yard with gardens--but only one bathroom. That was fine when it was just the two of us here, but sure got crowded when Lin's daughter and my two sons were home, too.

Our tiny foyer Powder Room!
We needed a powder room. We three boys weren't willing to use the bushes in broad daylight or wintertime. Question was, where the heck could we shoehorn in that half-bath? Our house is small by today's spacious standards, at about 1100 square feet. We'd already turned one of the three bedrooms into our den. We didn't want to put a bathroom in the basement, unless there was no other choice.

Well, we had this "foyer"... That got us to thinking. It was part of the living room, and took up more space than needed. The tile there, one-inch white mosaic, was hideous. We had an entry closet and six feet of blank wall beside it. And what was on the other side of that blank wall? --a barely-used closet in our den. Light-bulb!

Great ideas come from 'give and take.' We realized we could give our den closet to the cause, and take some space from that over-sized foyer, add the two together, and have just enough room for a very handy little powder room. Fortunately, we also had access to the floor below, from the basement, for the plumbing. We did some checking, drew some sketches, and made the decision.

Step one was to fix the foyer footprint. For this, I had to go ahead and build the living-room-side walls of our future powder room, so the new entry tile would be the right shape. Building partition walls is easy enough, and not expensive (under $100). We even had an extra pre-hung door that was just the right size (free). For weeks, that was all we had--new foyer tile and a fake powder room (which we, of course, used as a temporary closet).
"Kids sure do love destroying things!"
Step two was to move our den-stuff out of that "extra" closet. Once it was empty, we could seal-off the closet doorway with plastic and bring in the big guns. We drafted my two boys to demolish the wall between the den closet and the fake foyer closet. Kids sure do love destroying things! They made a joyful mess, and that wall was gone in no time.

The boys helped me with construction, too. We turned the former closet doorway into the plumbing wall, which worked out well since I could put the studs where I wanted to. We set up for a new sink and toilet, made plumbing connections in the basement, added wiring for an outlet and light, and did some drywall work and trim to tie the whole thing together (under $200). My wife provided the layout and design direction.
Here's how we squeezed-in our new Powder Room
When we were done with that part, we had a room that was about 4 feet long and just over 3 feet wide--just barely big enough. The foyer door opened directly to the future sink, with the toilet tucked to the right. Before we could set those fixtures, though, we had to do the finish work. Lin did all the painting and I added ceramic tile on the floor and back wall. The tiles were left-overs; new paint was about $35 with supplies.

I had a one-piece sink-top and a decent toilet from previous jobs (free), saved for this occasion. We mounted the sink pedestal-style, which makes the room look bigger. We installed a recessed paper-holder for maximum leg-room by the toilet. It's a tight squeeze, but it all works fine. Lin found a beautiful framed mirror and ceiling-mounted light fixture (both used). We purchased a new towel-bar and glass shelf for over the toilet (appx. $40).

By the time we were ready to cut the ribbon on our new powder room, we'd spent about $500 outright, and made great use of stuff I'd had laying around--stuff you can find at yard sales or beside the road for next to nothing. I didn't add up our labor; but we can value it "under $500" as a reasonable guess. If you had to hire me to do all of this for you, we probably could triple that number. I'm glad we knew how to do this; otherwise I'd have been happy to spend the money!

The boys aren't here every weekend anymore; they're busy. And our daughter has a good job and her own place. We don't have to worry about five-in-the-house very often. But that little powder room gets used every single day. I can't even imagine doing without it again. It just might be the best small project we've ever done. 
_______________________________________________
One thing we figured out a bit later on: tiny bathrooms need ventilation! See the chimney chase on the drawing, above? We cut-in a natural "cold air return" there, and finally got some airflow in the room. My wife thanks me...

Wednesday, December 01, 2010

Here's how you can lay out tile like a professional - Part One

by Jim Bessey

"Proper prior planning prevents piss-poor performance" --common business adage

tricky bath floor tile layout
View from the doorway--a tricky bath tile layout!
Laying ceramic tile can be a good DIY project. However, before you lay a single tile you need a good tile layout. Some will say you can do this on graph paper. As a professional tile installer, I politely disagree. Paper layouts are no match for an empty room, properly prepared, and the real tiles scattered on the floor in front of you. Ever heard the saying, "proper prior preparation prevents project problems"? This counts double for laying tile.

The beauty of tile is that it's not a fragile sheet good, or a warpy wood product. You can 'play with it' like Lego, shuffling the pieces around until you have them just right. No cardboard templates are required, and you don't have to sort out the bad pieces (usually, anyway). Each tile will generally vary by no more than 1/32" - close enough to make tiles interchangeable.

Where should you start?
You don't want to get halfway through the job and find yourself two tiles short.
Make rough measurements first, on graph paper if you like, and be sure you have enough tile purchased to complete the job. Always allow no less than 10% for potential cuts and waste. You don't want to get halfway through the job and find yourself two tiles short. For one thing, you'll have a difficult time matching the tile lot for small quantities. Mixed-lot tiles can sometimes stand out as if they were a different color, so don't risk it.

Begin with an empty room, free of clutter and vacuumed clean. Typically, remove all existing baseboards. Same for adjacent hallways, if your tile will continue there, too. Have your backer board (or similar tile underlayment) ready and handy, but uninstalled. You'll want to be sure that backer joints and tile joints don't coincide. The only way to know this is by laying out your tile in advance. Decide your grout joint size based on personal preference, and have spacers available. These are cheap, and go a long way toward producing professional results...  keep reading

Reprinted from the original on Helium.com  copyright 2010 - Jim Bessey
. Read Jim's profile at Helium 
  _______________________________________________
See this story as it appears on Helium.com 
     For more How-To Guides, see our new How To page, hosted here.

Saturday, November 20, 2010

Toilet Repairs: How to fix a troublesome toilet

by Jim Bessey

Troubleshooting common toilet problems

Not a single fixture or appliance in our homes is more crucial to our sanity than the lowly toilet. We expect our commodes to work every time, and we cringe with foul distaste when one fails in its humble mission. Yet a malfunctioning toilet must be fixed post-haste! If the kitchen sink is clogged, that can wait. Not so the potty. And it's all so distasteful: it's damp, perhaps a bit moldy inside, fouled by unspeakable germs and vile gunk no human should touch. The thought of calling a plumber, however, conjures visions of an exorbitant and illegible bill for emergency service.

Here are three secrets, revealed: First, you probably can repair that mis-behaving toilet yourself. Second, toilets aren't nearly as complicated as you fear. And last, except in the case of a truly disturbing overflow of the bowl, your toilet is much cleaner than you might expect. On the other hand, your fears of a pricey service call are well-founded. It's not at all unusual to pay almost $200 for a plumber's visit. For about $50 more than that, you could have a new toilet installed. It's worth your time, worth overcoming your reluctance, to at least give it a look.

Anatomy of the common toilet (U.S. design, residential):

Bird's-eye toilet view
Starting at the top: THE TANK. Although there are endless variations in shape and size, every commode has a water reservoir, usually a separate tank that holds ordinary tap-water used for flushing. A pipe emerges from the wall or floor nearby; most often you'll find a shut-off valve (with a small handle of some sort), which leads fresh water through a supply tube up to the tank. [Some tanks are cast as a unit with the bowl. This is a designer trick which makes repairs and replacement deliberately more expensive.]

Below the tank: THE BOWL. This part of the commode holds a second reservoir of water, necessary for effective flushing and for sealing off the sewer line from the air in your home. Most of us believe the toilet bowl to be hopelessly contaminated with exotic microbes. Unless you never clean it, that simply isn't true. Your kitchen sink almost certainly harbors more hazardous germs, especially if you have a garbage disposal.

The bowl covers the critical DRAIN. This is an two- to four-inch opening in the floor, leading directly to your main sewer or septic line. A clogged drain line doesn't even involve the toilet fixture itself; the problem's in the pipes. If your trouble lies in the drain line beneath the floor, that's the right time to call a plumber.

Things that can go wrong, and can be fixed:

Your shut-off valve can become clogged over time. If the tank seems to take an eternity to fill, the valve may need replacement. There's a second shut-off inside the tank, too: the one that sometimes doesn't stop running after you flush. For most toilets, that part costs less than $20 to replace. A typical brand of tank-filler is "Fluid-Master," sold in every hardware store. If you can shut-down either your water main or the valve with the handle below the tank, then you can do this job yourself. Cures most slow-fill or won't-stop-running issues.

Sometimes the "flapper" fails to function. In this case, water continually seeps or gurgles into the bowl (possibly wasting hundreds of gallons a week). Jiggling the handle is a common short-term solution. However, while the flapper's design varies from brand to brand, most home-owners can handle replacing that part themselves. Turn off the toilet's water supply for this chore, too.

The most humbling and distasteful problems come when the drain becomes clogged. If your handy plunger fails to clear the clog, go ahead and call a plumber. You could try "snaking" the drain yourself, but that's not a job for the faint-of-heart. Clogged drains can usually be blamed on some variation of "too much toilet paper." Prevention, and education of blissfully ignorant family members, is the only way to avoid recurrence.

The critical point: try not to be afraid. It's only a toilet. You don't have to be a rocket scientist to show the commode who's boss.


  Reprinted from the original on Helium.com.   copyright 2010 - Jim Bessey 
Read Jim's profile at Helium.com 
_______________________________________________
See this story as it appears on Helium.com 
    For more How-To Guides, see our new How To page, hosted here.