Creating kitchens and baths for finicky customers since 1993


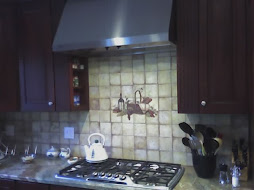
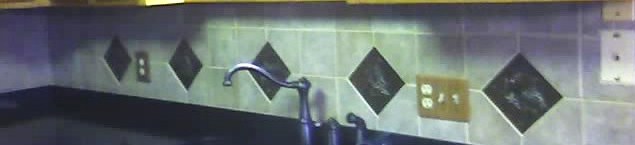
backsplash features inset metal tiles for accent and texture

Tuesday, March 17, 2009

DIY Tile Pic of the Week: Find your tile niche

A custom tile niche evokes classic Roman charm in a bathroom.

custom tile niche When you choose tile for your bathtub or shower makeover, you might want to consider including a classic tile niche. This is not a project for the uninitiated! However, for design harmony and beauty, it's hard to beat.

The project shown used 12" by 12" porcelain tile, 3/8" thick -- not an easy tile to cut or install. Choosing a smaller, thinner ceramic tile reduces the level of difficulty significantly.

Typical "soapdish" accessories are single molded ceramic or "cultured marble" items that you purchase and install. This usually involves cutting two to six field tile (the standard tile used) to fit around the installed fixture. You might have to cut a hole in the wall and use some silicone caulk; but that's usually the extent of it.

As you can see from the image, a tile niche demands far more cutting, fitting, and finish (grouting) finesse. This fixture took the place of four 12 x 12 field tiles; each of these had to be carefully cut (last) to fit around the indented area. All tiles used in the niche follow the grout lines for the containing wall. Notice how critical the placement of the niche within the field tile is, in this case.

Add them up, then: there are 24 distinct cut tiles used in this installation. (That's more than 24 cuts, since some tile pieces required two cuts.) The picture-frame border you see was composed of bull-nosed edging tiles, with the eased edge facing inward. This prompted eight mitered cuts which had to be carefully fitted.

Grouting an inset tile fixture is more difficult than finishing around a protruding soapdish, too. More care has to be taken with the original fit and with the grouting itself, since every joint shows. This is not a place to be "off just a little"!

You might ask, "why bother with all this extra effort?" The answer appears just below the subhead for this post, and is worth a thousand more words.

DIY tile pic for week of Mar 16 2009

copyright 2009 - all rights reserved
_______________________________________________

See this photos like this featured along with all sorts of other related ceramic tile information and articles on the new DIY Tile Zone at Helium.com.

If you have a DIY tile pic that you'd like to share, please leave a Comment here. If I use your picture, I'll link to your blog or website. ~Jim

Sunday, February 22, 2009

DIY Tile Pic of the Week: Cottage backsplash

Nostalgic cottage-style tile backsplash uses "subway" tiles and more:

 
cottage tile backsplash in white and tan

This week's project was one that could indeed be completed by a DIYer on a weekend. It's a classic cottage design using "subway" tile (note the offset layout) in two sizes and colors.

The tan tile in 5 by 5 squares forms a visual 5" backsplash. The same color is reflected in the top band (cut to size on site). These tan tiles ground the wall area and frame the off-white subway tile mid-section, creating a three-dimensional effect.

See the small inset tiles in beige? Those are pears, apples, and grapes. This adds to the texture and depth of the stove's backdrop. Using fruit, rather than a more abstract design, makes for a homey feel. This is Gramma's Kitchen, for sure. (Literally, in this case.)

Later, the homeowner will paint the surrounding cabinets using both colors from the tile to follow-through with this theme. Since both hues are neutral, all sorts of bright-color possibilities are open for accessorizing.

At just under thirteen square feet, this job budgets at well under $1,000 and is easily completed in less than ten hours total work time (one weekend is best). Tools required include a wetsaw (rental widely available), and the proper size trowel (per adhesive manufacturer's instructions).

Notice how the mixture of three different tile sizes really makes this difference in this small job?

DIY tile pic for week of Feb 22 2009

copyright 2009 - all rights reserved
_______________________________________________

See this photos like this featured along with all sorts of other related ceramic tile information and articles on the new DIY Tile Zone at Helium.com.

If you have a DIY tile pic that you'd like to share, please leave a Comment here. If I use your picture, I'll link to your blog or website. ~Jim

Thursday, February 12, 2009

DIY Tile Pic of the Week: Natural stone shower walls

Walk-in shower uses natural stone squares in 6 by 6


natural stone shower walls in 6 by 6

This 44" by 32" shower, completed just before the New Year, features slate tiles from Home Depot. Grout lines are 3/16", to showcase each tile.

Natural stone is one of the more difficult products to install. Each 6" by 6" piece is unique. Thickness, especially, varies quite a bit - from nearly 1/2" to barely more than 1/8". Some tiles aren't exactly square, and others have one or more "missing" corners. Proper installation calls for careful attention to sizing, spacing, orientation, and color/texture.

This is a great way to express your individuality. No two installers will put these tiles together the same way, so even "identical" projects won't be. Some slates are very jazzy, while others much less interesting. Deciding how to showcase the fancier ones makes all the difference.

This wall material should be sealed prior to installation, for best results. Grout loves to stick in the nooks and crannies of any natural stone tile. For a wet area like this, sealer is even more important. Because they don't have the typical glasslike finish of ceramic or porcelain tile, stone tiles are more difficult to keep clean.

Are the results - a beautiful and unique design - worth the extra effort and maintenance? That's a personal choice; only you can decide for yourself.

DIY tile pic for week of Feb 12 2009

copyright 2009 - all rights reserved
_______________________________________________

See this photo featured along with all sorts of other related ceramic tile information and articles on the new DIY Tile Zone at Helium.com.

If you have a DIY tile pic that you'd like to share, please leave a Comment here. If I use your picture, I'll link to your blog or website.

Friday, January 30, 2009

DIY Tile Tip of the Week #4

Buy clearance tile to save money:

buy clearance tile to save money I love ceramic tile, but it sure can be expensive. There's such an incredible price range, from about a dollar per square foot to $50 a foot and more. I'm a cheapskate at heart, so I've never paid full price for tile I've installed in my house.

Did you know that most tile retailers have Clearance Tile on hand regularly? With so many tile choices, these smaller stores don't usually stock much tile. It's all special-ordered from larger wholesalers. So what happens when orders get cancelled, or don't get picked up? What about when customers return a box or two that turned out to be "extra"? That's how tile clearance land happens. It's just too expensive to ship heavy tile back for credit most of the time.

This same "we don't want to ship it back" attitude is true for some tile installers, too. We have a huge rack filled with orphaned boxes of tile in the shop I work for. This tile can be bought for pennies on the dollar.

Even the big box stores like Lowes and Home Depot sometimes offer deep discounts on their ceramic tile inventories. When they discontinue a style and get down to just a few boxes, they want that tile GONE. You have to be careful that there's enough square footage to cover your project, but the savings are major.

What could you do with just a box or two of tile you find deeply discounted?

  • A fireplace surround

  • A bathroom accent area over a vanity

  • A small foyer - mix and match for a larger foyer

  • A fancy bathroom vanity top

  • A cool tile inlay coffee table

  • A small section of backsplash for your kitchen, maybe just behind the stove
With an open mind and a sharp eye you can find some great bargains on formerly-expensive tile for your next project. Or find some interesting tile first and dream up a project to fit. Let your imagination run wild with really cheap tile!

This is Tip #4, Jan 29 2009

copyright 2009 - all rights reserved
_______________________________________________

See this tip [coming soon], and all sorts of other related ceramic tile information and articles on a brand new DIY Tile Zone at Helium.com.

If you have a DIY Tile Tip that you'd like to share, please leave a Comment here. If I use your tip, I'll link to your blog or website.

Friday, January 16, 2009

DIY Tile Tip of the Week #3

MIX TILE SIZES for great designs:

foyer tile uses smaller diamonds

Ceramic tile comes in a myriad of sizes and shapes, yet most tile projects use a single size - usually square - in a plain grid pattern. You can spice up your next ceramic tile design by mixing small tiles within a field of larger tiles.

This isn't rocket science for interior design; it's done all the time by professionals. No reason you can't adopt their visual strategies to make your DIY tile job look fantastic.

Choose your main "field" tile for base color and coverage. A medium-sized floor area, for instance, might best use 12" square tiles of a pastel earth tone. This selection provides lots of design flexibility. Now choose an accent color in a smaller tile to add visual flair to an otherwise ordinary floor.

Small tiles can be added as inset borders or as linear stripes, or positioned like diamonds (see photo) where four square tiles meet. Remember that ceramic tile last for decades, so be careful about choosing colors that dictate future decor choices too stringently.

The important thing is choose pizazz over plain. If you're going to the trouble to lay tile that will last a half century, you might as well make your project provocative! Or at least interesting. Have a look at some of the pictures displayed here (sidebar, for instance) to see examples of jazzy tile designs of all sorts.

This is Tip #3, Jan 16 2009

copyright 2009 - all rights reserved
_______________________________________________

See this tip [coming soon], and all sorts of other related ceramic tile information and articles on a brand new DIY Tile Zone at Helium.com.

If you have a DIY Tile Tip that you'd like to share, please leave a Comment here. If I use your tip, I'll link to your blog or website.

Thursday, January 08, 2009

DIY Tile Pic of the Week: Tiny tile floor

Foyer powder room floor is small but eye-catching

small powder room, fancy tile

Our very latest DIY tile job was one of the smallest floors I've ever done, for our brand new powder room. We used left-over ceramic tiles from a couple previous jobs, blending them for a unique effect.

With less than 16 square feet to cover, this project called for simplicity. We hoped to achieve a touch of elegance, while blending this new tile floor into our existing tile foyer. Each area uses shades of brown and tan, and features large (12" square or 13" square) tiles accented with much smaller tiles.

The foyer pattern uses two accent tile sizes in a symmetrical diamond pattern - much too busy for the new powder room. We thought at first to make a basic inset border using the brown tiles. Even this was too much, so we opted for an asymmetric "L"-shaped design instead. Bull-nosed base ("splash") tiles in a shade between the two colors used brought it all together.

The wall tiles you can see in the picture are the same color and type as the large floor tiles, but much smaller. We used the minimum width grout lines for those, and chose "alpine white" for grout, to compliment rather than match the floor's "mocha" grout selection.

The finished job has a regal Tudor feel to it, without being overbearing. What do you think? Good choice, or still over the top for such a tiny room?

DIY tile pic for week of Jan 5 2009

copyright 2009 - all rights reserved
_______________________________________________

See this photo [coming soon], and all sorts of other related ceramic tile information and articles on a brand new DIY Tile Zone at Helium.com.

If you have a DIY tile pic that you'd like to share, please leave a Comment here. If I use your picture, I'll link to your blog or website.