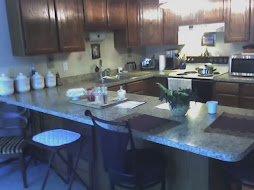
Creating kitchens and baths for finicky customers since 1993


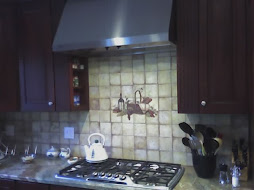
backsplash features inset metal tiles for accent and texture

Tuesday, December 02, 2008

Small bath gets a dramatic tile facelift

Updating a bathroom on a budget

bath floor uses diagonal tile pattern
One of our November projects found us leaving the tub and vanity in place, and using ceramic tile to bring a small bathroom into the new century. This customer's house size, style, and location precluded spending big dollars on the main bath. The homeowner, however, found a great way to use ceramic tile to upgrade his 30-year-old bathroom.

We removed the existing (dreary) vinyl sheet floor and laminate vanity top. The toilet was removed but set aside for re-use after work was completed. Even the original pine baseboard was carefully detached and saved for later. We added rock-solid DurRock brand tile sub-floor and a new 1 1/4" thick substrate for the new vanity top. All plumbing shut-offs were replaced, too.

While many of our remodelling jobs find us removing nearly everything - sometimes even the drywall - this project focused on adding beauty on a budget. Large floor tiles, 12 by 12 inches, set in a diagonal pattern create dazzling visual appeal in this small space. Laying the tile diagonally requires much more careful measuring and layout, and far more cutting time. The results, however, prove the payoff.

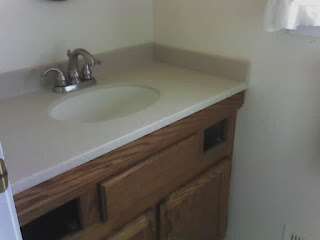
all new tile vanity top in chocolate The new ceramic tile vanity top, crafted completely on-site, uses color contrast and smaller tiles (6 by 6 inches) for dramatic effect. Chocolate-colored tiles and matching dark grout, plus the addition of an over-height back-splash, accent the pure white porcelain sink for a complete sink-top makeover. Notice how perfectly the correct nosing tiles form the top's edge.

Even a small bathroom can soak up more than $10,000 after all materials, labor and fixtures. Not every homeowner can justify this level of investment in a single bath. In this case, our customer settled on a lower budget and made the most of it. Few visitors would guess that this was a "low-budget" remodel.

copyright 2008 - all rights reserved
_______________________________________________

What money-saving ideas have you used to fix-up your kitchen or bathroom? Leave a comment here, or contact me via email if you have a creative project-budgeting story to add.

Thursday, November 13, 2008

Kitchens: A simple and elegant tile backsplash

ceramic tile backsplash with inset pewter diamonds
Our most recent ceramic tile backsplash project was modest, but lovely. This customer's small kitchen lent itself to elegant understatement. I think we achieved that result.

With many designers choosing "random" patterns, this one used more symmetry than usual. I'm a fan of balance and linear alignment, so I enjoyed making this design work out right.

We used a relatively inexpensive ceramic Florida Tile -- one that imitates a much pricier tumbled stone. Irregular edges are implied within the tile's varied surface patterns; yet the tile remains true-square, making it easy to set.

The insets you can see in the picture appear to be pewter (though I'm not certain what material is actually used). Each "diamond" is the same, with a simple geometric face pattern. Spacing and offset is identical, except at the stove. There's a single diamond that isn't centered between the junction of four tiles, placed instead in the center of two tiles stacked vertically. Can you spot it?

Both tile and grout used muted earth tones to provide the best backdrop for accessorizing. After this picture was taken, the homeowner repainted the walls, too, to better match this theme. All grout lines were protected with a spray-on grout sealer. This type of application uses volatile chemicals with a high evaporation rate (similar to laquer). The smell is dizzying at first, but outweighed by the extreme ease of application.

For the customer, a new ceramic tile backsplash like this adds beauty, value, and durability in the kitchen. As projects go, the cost is reasonable (depending upon tile selection) and not too intrusive. This backsplash took two days to complete.

copyright 2008 - all rights reserved
_______________________________________________

For a look at a similar project with a whole different look, and much bigger diamonds, see the photo at the top of the page.

Sunday, October 26, 2008

Bathroom projects: A new ceramic tile floor

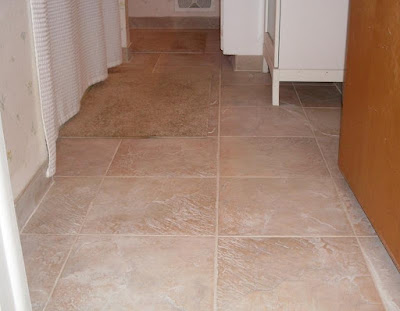
new ceramic tile bathroom floor
Our most recent weekend bathroom project transformed our hideous linoleum floor into a beautiful ceramic tile finish. With hours of help from my two handy sons, this chore started on Saturday and wrapped up Sunday afternoon. Good thing, too, since it's our only bathroom!

Bathroom floors take constant abuse from water, bare feet, and heavy traffic in general. Our original floor had gotten so ugly, and was so difficult to clean, that we generally closed our eyes on entering. In addition, the wood baseboard and shoe molding needed complete refinishing. I'm not sure what we could have done about the creepy smeared caulk around the perimeter. (Previous owner)

So what did we do about our icky floor? My youngest ripped out all the wood trim, and the three of us re-nailed the whole floor -- right through the old vinyl floor. We might have chosen to strip out all the existing floor materials down to the sub-floor, but that would've added another full day to the job. Since I'm the only one who has to guaranty this new installation, we cheated a bit. (Adding 1/2" DuRock or similar tile backer is a safer choice.)

The new tile we chose is very heavy, and imitates a weathered sandstone. Nice grip, and a dramatic three-dimensional look. Our new theme is "beach cottage" so this works perfectly. While it will be more difficult to clean than a smoother, shinier tile it adds enough character to the room to offset that concern.

We decided to use narrow (1/8") grout lines to emphasize the tile over the pattern, and to reduce the amount of exposed grout area. Grout stains much more easily than does tile, because it's so porous. We'll apply a sealer, but that's not a cure-all. The result, as you can see, is a floor that looks very much like an exposed sandstone shelf like you might find in a river or at a beach. Perfect!

copyright 2008 - all rights reserved
_______________________________________________

What's your opinion -- did we make a good decision? Do you think that a textured ceramic tile makes sense for a bathroom floor? Have a look at what we did to refinish our oak plank dining room floor for comparison.

Tuesday, October 21, 2008

Bathroom projects: Bugs in the tub!

bathtub walls hid a nest of black ants
Who knows what evil lurks behind a 30-year-old ceramic tile tub surround? I do! About half of my jobs involve new tile bathtub walls, mostly to modernize dated designs. Day one almost always involves some heavy lifting -- tearing out old walls and tubs and hauling the debris down a flight of stairs. It's hard work but generally routine.

The usual tools required are a saw, hammer, pry-bar (I have a really big one), and sometimes even a sledgehammer. But I don't usually need a can of Raid! When your old tile has missing grout, however, water can seep behind the tile and create a haven for certain bugs and mold or fungus. Moldy drywall behind the tile is pretty common, but finding a nest of ants lurking back there is (thankfully) rare.

close-up of ant colony found behind bathtub
The mess shown in this close-up shot is all cleaned up now, but it was touch and go there for a few minutes. I don't carry bug spray, and so had to hastily search my customer's basement shelves for a remedy. Those little critters were extremely healthy and mobile. They would've spread far and wide if I hadn't come up with a quick cure.

When I've finished this job I'll stop back and post the after picture. This time I can safely guaranty "major improvement"!
_______________________________________________

Have you ever found something scary hidden behind the walls during a remodel project? Or have you discovered a long-lost treasure under the floorboards? Leave a comment here or contact me via email if you'd like to share your find.

Monday, October 13, 2008

5 Tips for Organizing Your Tool Shed

Keeping your tool shed organized is one of life's baffling challenges.

this tool shed needs organizing! jcb 2008 An outbuilding for tool storage can quickly become an unmanageable shelter for all sorts of useless junk, unless you start out with a system. Two problems contribute to the ill-repute of tool sheds: (one) they are usually too far from your house for convenience, and (two) you often end up storing things away in a panic when bad weather descends unannounced.

Here are five tips for avoiding tool shed nightmares.

First, decide what belongs in your tool shed.

Is this building your lawn and landscape management center? Or is it your own private workshop? Make a decision, and banish all unrelated items from the premises. If your 20-horse John Deere lawn tractor lives inside, then keep your table saw somewhere else. If your shed houses clay pots, potting soil, peat moss, and garden implements then leave the skis, golf clubs, and bicycles in the garage or basement.

Second, un-clutter your tool shed's floor.

Stop thinking of the floor as a place to put "stuff." Things get wet and rusty down there, and then you trip on them and get angry and break valuable possessions. If you simply must store things on the floor, put them in cheap plastic bins and label them clearly. Then, when you need to move that junk just to get at the important things, it's easy. Not only that, you'll actually know what you have stored in there.

Third, add shelving right away.

Shelves make organizing and retrieving your tools and supplies easy, and they help keep the floor navigable (see previous tip). For damp sheds, choose easy-to-assemble plastic shelving. For heavy boxes of supplies or tools, choose metal shelf systems when moisture isn't a problem. If you're a bit handy, build in some wooden shelves for the most versatility. Make your shelves twice as strong as they need to be for the load you will place on them, and that whole ugly "sway-back" shelf syndrome won't be your undoing.

Four, use rafter storage carefully.

When you start loading up your little shed's rafters with boards and long tools and other junk, you are admitting that you really don't have enough room in there. Face it, things placed in the rafters often remain there undisturbed for years. They sit there getting moldy, gathering black dust and spiders, useless. Consider using hooks instead. Hang up tools or other items that you use MORE often, not less. They'll be at eye level and easy to find, and you'll soon learn which objects belong where. "Hey, who took my good garden rake?" You'll know it's missing because its customary spot will be empty and quickly noticed.

Five, and finally: keep your shed clean and ventilated.

If you've sensibly organized your gear, then a quick sprucing-up will be a breeze. If possible, add an outlet and lighting so you can run a shop-vac out there. The spiders won't like this approach, and you'll smile when you open the door to get inside. If you can add a small window for natural light and ventilation, even better.

Invite outside air inside by installing a couple vent grilles in the sidewalls, if a window isn't practical. Gable or ridge vents similar to the ones on your house can also be used to keep air flowing inside. Why does this matter? Because fresh air makes your shed a better place for you, and for all your valuable stuff.

It's all about your attitude, in the end. If you see your tool shed as a nice place to visit you'll take better care of it. Your things will be where you expect them to be, and you won't just toss junk in there hoping to "get back to it later." One final thought: put a good lock on the door. No sense inviting burglars into your little sanctuary, after all your hard work.

copyright 2008 - all rights reserved
_______________________________________________

See this story as it appears on Helium.com

Thursday, October 09, 2008

Projects: Ceramic tile and air-jet tub

Our most recent big bath project had us install a new air-jet tub with a gorgeous ceramic tile tub surround. We replaced the owner's original, dysfunctional whirlpool-style tub and tile combination with all new product, including the faucet and fittings, and a polished brass shower door.
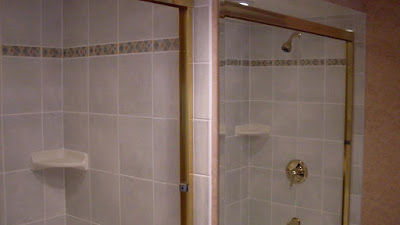
ceramic tile tub surround over air-jet tub The tile is a tradional, glossy 8 by 10 with an inset border. Installation included two ceramic corner shelves and a center soap dish. Grout lines were held at just one-eighth inch to emphasize the tile itself, rather than the pattern.

ceramic tile surround with inset border tiles over air-jet tub This second image is a bit tricky. It's a shot of the right end of the tub, with the fixture (left) end reflected in the sink area mirror. This project took about eight man-days, and involved no less than one hundred trips up and down the main stairs.

Sunday, September 28, 2008

Our refinished oak plank floor...

Oh how it shines!

refinished oak plank wood floor, the glare makes me squint!
Why relax on the weekend, when you can tarp off your dining room and refinish the ratty old oak planks? We started this project late last fall, then realized it had gotten too cold to continue. An unusual stretch of warm days for late September gave us the push we needed to complete the job.

Last year we ripped up the carpet we inherited from the previous owner. Once we finished removing about 500 padding staples, we understood why the "lovely oak floor" had been covered up. We had to fix loose boards, heavy wear and water damage, and learn to live with quite a lot of face nails. We filled, sanded, and stained the floor and moved the furniture back in.

Phase II, "apply really stinky polyurethane finish," began on Saturday. With priceless help from my oldest son, we sanded and stained all over again. (A year's worth of use takes its toll.)

Then, with every door and window wide open, we worked together to lay down the first of three coats. The finish was one I've used before, Minwax Fast-Drying Polyurethane clear semi-gloss. Note that "fast-drying" translates into "dangerous fumes." Even with all that fresh air coming in I ended up with a headache.

The glaring shine you can so plainly see in the picture comes from adding two more topcoats (per the manufacturer's recommendations). That meant two more rounds of full tarping to seal off the doorways for re-sanding with 220-grit. Applying those two extra layers of finish was almost fun, by comparison, despite the resulting headache. Now I can be fairly sure that our refurbished dining room floor can handle some heavy traffic.

We'll move the furniture back in after letting the new finish harden up for a day. I'll stop back and post another picture then.

Saturday, September 27, 2008

If you think it's tile, but it's not...

...it's linoleum!

linoleum looks like tile in powder room remodel
Not every customer wants a new tile floor, and it isn't always about budget.

This week's powder room makeover called for an Armstrong vinyl floor that the homeowner had carefully selected after much consideration. Her kitchen floor was linoleum, too, and had held up beautifully over time. Since the powder room is right across the hall from the kitchen, it made perfect sense to match and compliment the existing surface.

There was a glitch in the process, when my customer's selected floor wasn't available immediately (one-day order time), but we worked it out. I had to do some serious advance work to make sure that everything was ready to go. Usually the floor goes in right after lunch on Day One. This time, it didn't get installed until the middle of Day Two.

Day Two was also the final day! How often can you do a powder room makeover in just two days? Well, please don't ask me to do it again any time soon. I didn't spend much time sitting around, and the second day lasted until almost dark.

Despite the glitch, this room was ready for fresh paint just in time. Have you ever tried to reschedule a professional painter on one day's notice? Don't bother. We stayed on schedule and got the job done in the end. I'll stop back next week to install a couple missing fixtures; other than that, it's a wrap!

Sorry, that flash-picture doesn't do the job justice. Too much glare off the vinyl floor. But you get the idea. With fresh paint all around (not pictured), this little room looks very nice indeed.

Tuesday, September 23, 2008

My kingdom for a stud finder?

Today's powder room tear-out involved removing all the baseboard. This is usually an easy task, but I couldn't get these pieces out without breaking some. This surprised me until I got them all the way out. Can you count the nails?


wood baseboard filled with finish nails

Tuesday, September 16, 2008

...and the Tile goes on...diagonally this time

Here's the finished product for a new ceramic tile bathroom floor, mentioned in the last post:
new ceramic tile bathroom floor in diagonal 12 by 12's

The antique-look vanity and Kohler one-piece toilet are brand new, too.

diagonal ceramic tile with new vanity and Kohler toilet

Thursday, September 11, 2008

Has it been ten weeks of ceramic tile?

Floor tile, wall tile, kitchen backsplash tile -- seems like that's all I've been doing for more than two months now. When you do kitchens and baths for a living, you have to be prepared to do some serious ceramic tile work. Lately, however, it feels like I spend more time trowelling thinset, cutting tile, and floating mortar than anything else.

full bath with tile floor and walls
It started way back in July with a major bathroom overhaul. Everything went into the dumpster, including the drywall. After about two weeks of prep (and some serious help from my son!), I added a full-height ceramic tile tub surround and a new tile floor. The floor was interesting because the tiles didn't "match." They varied in shade from very pale to an earthy brown speckle.

I'd had a nice break before that with a full kitchen for a very nice family. The big bath job was done during the delay while the kitchen cabinets were measured for granite countertops. After those tops were installed, I returned to add in a fancy tile backsplash with glass insets in a Rubik's Cube pattern (sans the colors). fancy backsplash tile with glass insertsThat was a few weeks ago, and it was the last time I can recall installing tile on my feet.

For a great change of pace, I had a tiny bath makeover. It was only a powder room, but that small space got a whole new look with a modern tile floor laid over the original mosaic-over-concrete. This half-bath originally featured a wall-to-wall vanity that seemed to fill the whole room. After the new tile floor, a tidy pedestal sink and new toilet made the small room feel much larger and look decades newer. My customers were so pleased with the results that they've started planning for a similar re-do for their upstairs bathroom. Since that tile is laid over a wood floor, the install for new tile there will use more typical methods.

new bath tile laid over old bath tile I'd never done tile-over-tile before, and was pleased with the results. Oddly enough, the very next job required the same approach. This was a big old house in a very nice neighborhood. It was a lovely home, but in many ways hopelessly dated.

The homeowner was on a tight budget, but wanted a new look for his two 40-year-old bathrooms. Leaving the original tile floors in place and using them as "subfloors" saved a lot of money. With some solid help from my youngest son, we transformed those dreary old rooms in less than three days. My son must have done a good job -- the customer gave him a tip!

master bath tile makeover Somewhere in between all that I spent a day kneeling on a kitchen floor installing 12x12 tiles as fast as my brother-in-law could cut them. It was hot that day and I was sweating from the humidity, so some of that job is just a blur to me. Since he did all the grouting himself, I'd almost forgotten about that job. My poor knees remember it well, though. I also remember tiling inside a pantry closet that was shaped like something you'd find in the video game Tetris. I did that one mostly by feel.

This week started with a new ceramic tile floor in a 70's-era sublet condominium. The tear-out was easy because the toilet had apparently been leaking for years, so the original concrete-base tile floor had almost completely lost its bond with the wood subfloor. I think I set some kind of re-do record on that job, just because everything went right.

That job really set me up for a fall on the next bathroom, started on Thursday. Man, was I over-confident! The old floor was every bit as strong as it was Year One, and the new tile floor was designed on a diagonal. So the tear-out was incredibly exhausting, and the new work involved at least twice as much cutting. I have to admit, however, that the results are pretty impressive. With luck, I'll finish that bathroom on Monday. Maybe I'll be able to put away the tile tools for a few days after that. We'll see.

Saturday, August 30, 2008

Our very own Extreme Garage Makeover

- or, oh how I wish I'd taken some "before" pictures!


Picture if you will, a garage, filled with the accumulation of over one year's gathering of "stuff." A garage so crowded with assorted useful debris that only a four-foot walkway remains. And picture yours truly, the homeowner, arriving at his castle after a hard day's work filled with dread at the prospect of seeing the sorry state of his own garage.

Most workdays I need to swap one set of tools for another, or find a place to park some materials for the next day's job or a future project. The degree of disorganization that greeted me each night had reach depressing proportions. Something had to be done. What better way to spend the first perfect day of summer's final weekend?

I drafted my eldest son for this overwhelming task. We started with a trip to Lowe's for supplies and picked up various sizes of potential shelving for our attack on garage clutter. I'd hoped to buy a new set of front-loading bins for our recyclables, but we couldn't find a single one there. Home Depot has them, but we were already at Lowe's and the clock was ticking on our workday. We paid for our shelving and drove home to dig in.

We began, of course, by dragging almost all the junk I'd stacked in the garage out into the driveway. This process filled the space of three large vehicles. Both of us uttered various sighs of concern at the size of the job ahead. It was hard to figure out where to begin.

In the end we discarded one extra trashcan, one large bookcase, two perfectly good porcelain sinks, one fishing pole, two very large boards, and an entire trash-tote full of assorted worthless junk. For about an hour there was actually room in our garage to park a normal-sized car (not our goal). We assessed our shelving purchases and set-up shop.

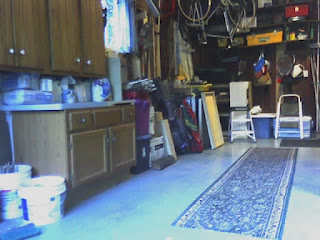
garage makeover adds new shelves and cabinats

In the pictures you can see the two new cabinet shelf pieces we created. The one on the right is for ceramic tile and related supplies. The one in the back left corner is for "other stuff" and isn't even close to full! We also moved the oak base cabinet seen on the left wall -- it used to be buried under the front workbench. We gained about twenty square feet of work surface and found good spaces for everything that wasn't headed to the dump.


workshop view of garage makeover and new cabinet

Will another year's pack-ratting result in the same gloomy situation that we just corrected? I hope not. My real goal is to make decisions about which items will actually get used, and which should be given away or trashed. Some of what's stored in our garage is slated for exisiting to-do list projects. At least now I know what we have and where it is. I just might check-off a couple more lines on that list after all.

Tuesday, August 26, 2008

Using the vanity-stretcher to update a bathroom

white vanity grows 4 inches taller!
Remember back in the olden days, when we were all shorter? Ever get a kink in your back from bending over to use one of those too-low bathroom vanities? That was today's customer's problem, and I helped fix it without replacing her existing vanity.

With a couple hours' carpentry and less than $100 in materials, plus one new fancy vanity top, we've saved our customer's back and updated her bathroom dramatically in one quick makeover. Did you spot the fact that this vanity has been modified before your read this text?

I showed my wife this picture earlier, and she said, "that'll work fine for ours, too. When can you get that done?" (She smiled while she said it.) Seriously, though, it's a very handy and affordable bathroom trick! The second vantiy is shown below. That oak strip you see just beneath the new top was an ordinary hunk of oak from Home Depot, cut and stained on the job site.

oak vanity grows three inches taller

Saturday, August 23, 2008

Extreme Home Make-over day 2

Loading up trusses for new Extreme Home
Day Two for Extreme Home Make-over in Geneva. Work continues as the new Hill house takes shape. Orange shirts are crew members for the general contractor, and blue shirts are TV Network staff and volunteers.

The house is well underway, with trusses headed for the roof via on huge crane, and landscapers racing around filling in and fixing up. The crowd is bigger, too! Luckily for the work crew, the weather is as close to perfect as it gets in Western NY. They'll work three shifts through the nights, with caterers feeding 250 staffers at a seating, several times each day. Can you even imagine the logistics of this operation?
Extreme Makeover house takes shape
Click the title link above to view the complete Web Album from Google
Posted by Picasa

Thursday, August 21, 2008

Extreme Make-over: Home Edition visits Geneva, NY

Extreme Home Makeover crane awaits orders
Geneva, NY: ABC's Extreme Make-over: Home Edition crew arrives to begin work on the Hill family's new home. During the five days left for construction following Wednesday morning's demolition, the team will draw from a pool of several thousand volunteers to complete a 3,200 square-foot home and 2,800 square-foot barn. The Reveal is set for Monday, August 25 at 2 pm, EDT.

Geneva sits at the head of Seneca Lake, in the Finger Lakes, just thirty-some miles south of our home in Fairport, so we raced over to join the crowds on Wednesday afternoon. The construction group has commandeered several homes surrounding the site, as well as a funeral home parking lot and a second city lot for staging vehicles and materials. Two city blocks are closed completely to traffic.

Extreme Home Makeover crowd near caterer's tent

Work began first on the outbuilding situated behind the new residence. We could see two or three tall walls behind the giant excavator that was scooping out the house's basement. We gathered with a few hundred other onlookers behind the famous barricades set up across the street from the work site. On the day of The Reveal, cameras will show the huge crowd occupying that same area, before panning to a shot of "the bus." After that, Ty Pennington will utter his famous line, "Bus driver, move that bus!"

Click the title link for all Day One pictures on Google.

Monday, August 18, 2008

We've been floored!

creepy old linoleum floor
What can you do with one of the most perfect weekends of the entire summer?

First you can work most of Saturday on an outdoor project (pictures coming soon). Then you can finish that project on Sunday morning. After that you can watch a bit of the NASCAR race (Carl Edwards swept the weekend), and then decide on a whim to go buy new laminate flooring for your kitchen. Yup, that's what we did.

There's no sense buying new flooring and then storing it in the garage, so we spent the evening installing it. Had my two best and favorite helpers along for the ride. We had fun, and transformed our ugly linoleum floor into a thing of beauty and luster in about five hours. See above for "before" and below for "after" pictures. We're so happy we finally got this done!

brand new laminate floor in cherry finish

That'll save about two thousand words...

PS: Want to see more pic's of our various home projects, and this year's "tropical" garden? Just click on the title of this article to navigate to more home photo's.

Tuesday, January 15, 2008

Construction? --what construction??

Under Construction!
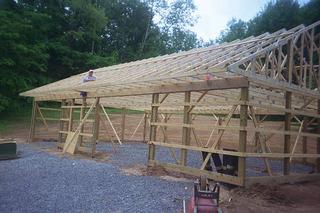
Yup, that's me in the trusses, and that is an actual Construction by D'Zyne. But that was 1999, before I discovered the beauty of working indoors. We don't actually build pole-barns or large additions anymore. What we do now is Kitchens and Baths. No more of that old "Jack of all Trades, etc." thing for me! This site will serve as a diary for my current jobs, and also as a place where you and I can talk about the business. Got a question? I'll do my best to answer it for you...