Creating kitchens and baths for finicky customers since 1993


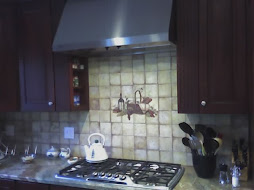
backsplash features inset metal tiles for accent and texture
Showing posts with label Baths. Show all posts

Sunday, July 15, 2012

Fresh pictures posted on Featured Projects page -- your feedback welcome!


by Jim Bessey

accent tiles in wall band and niche jazz up tan tile surround
This tan tile was almost boring -- until we added the accent tiles!
With a light rain falling this morning, today was a fine day for digging through my photo archives. I've been meaning to post new pictures on the Featured Projects page, but had kept being sidetracked by other, more pressing, deadlines.

Trouble is, even though I don't take dozens of pictures from each job, I've still accumulated hundreds of photos without any helpful organization. So I had to do some organizing. First I backed up a big batch of work pics, then I began slashing.

Two pics too similar? One of them had to go. Overexposed? Gone. Boring? Delete. I fixed and lightened and cropped and shuffled folders, renaming both folders and images so the names made sense--not just dates and job names.

While I was doing that, I put together three CD's with assorted images for Scott Bacon, at McKenna's Rochester Kitchen & Bath, the company I do remodeling work for. He's been polite about asking me for the past few weeks. Now I can finally hand him something useful.

So I've added a variety of interesting tile project pics to that long-neglected page, too, finally. I'll keep going, now that I can see what's what. Have a look, and if you see something you like (or hate?) please do leave a Comment here. Thanks!
_______________________________________________
If you have tile project pictures or helpful project advice you'd like to share, please leave a Comment here or contact me directly. ~Jim

Sunday, April 24, 2011

How we turned a bedroom closet into a powder room, for under $1,000

Have you ever tried to fit five people into one bathroom? When we bought our 1964-built ranch house in Fairport we knew it was only almost perfect. It was big enough, had a garage and walk-out part-finished basement, a lovely yard with gardens--but only one bathroom. That was fine when it was just the two of us here, but sure got crowded when Lin's daughter and my two sons were home, too.

Our tiny foyer Powder Room!
We needed a powder room. We three boys weren't willing to use the bushes in broad daylight or wintertime. Question was, where the heck could we shoehorn in that half-bath? Our house is small by today's spacious standards, at about 1100 square feet. We'd already turned one of the three bedrooms into our den. We didn't want to put a bathroom in the basement, unless there was no other choice.

Well, we had this "foyer"... That got us to thinking. It was part of the living room, and took up more space than needed. The tile there, one-inch white mosaic, was hideous. We had an entry closet and six feet of blank wall beside it. And what was on the other side of that blank wall? --a barely-used closet in our den. Light-bulb!

Great ideas come from 'give and take.' We realized we could give our den closet to the cause, and take some space from that over-sized foyer, add the two together, and have just enough room for a very handy little powder room. Fortunately, we also had access to the floor below, from the basement, for the plumbing. We did some checking, drew some sketches, and made the decision.

Step one was to fix the foyer footprint. For this, I had to go ahead and build the living-room-side walls of our future powder room, so the new entry tile would be the right shape. Building partition walls is easy enough, and not expensive (under $100). We even had an extra pre-hung door that was just the right size (free). For weeks, that was all we had--new foyer tile and a fake powder room (which we, of course, used as a temporary closet).
"Kids sure do love destroying things!"
Step two was to move our den-stuff out of that "extra" closet. Once it was empty, we could seal-off the closet doorway with plastic and bring in the big guns. We drafted my two boys to demolish the wall between the den closet and the fake foyer closet. Kids sure do love destroying things! They made a joyful mess, and that wall was gone in no time.

The boys helped me with construction, too. We turned the former closet doorway into the plumbing wall, which worked out well since I could put the studs where I wanted to. We set up for a new sink and toilet, made plumbing connections in the basement, added wiring for an outlet and light, and did some drywall work and trim to tie the whole thing together (under $200). My wife provided the layout and design direction.
Here's how we squeezed-in our new Powder Room
When we were done with that part, we had a room that was about 4 feet long and just over 3 feet wide--just barely big enough. The foyer door opened directly to the future sink, with the toilet tucked to the right. Before we could set those fixtures, though, we had to do the finish work. Lin did all the painting and I added ceramic tile on the floor and back wall. The tiles were left-overs; new paint was about $35 with supplies.

I had a one-piece sink-top and a decent toilet from previous jobs (free), saved for this occasion. We mounted the sink pedestal-style, which makes the room look bigger. We installed a recessed paper-holder for maximum leg-room by the toilet. It's a tight squeeze, but it all works fine. Lin found a beautiful framed mirror and ceiling-mounted light fixture (both used). We purchased a new towel-bar and glass shelf for over the toilet (appx. $40).

By the time we were ready to cut the ribbon on our new powder room, we'd spent about $500 outright, and made great use of stuff I'd had laying around--stuff you can find at yard sales or beside the road for next to nothing. I didn't add up our labor; but we can value it "under $500" as a reasonable guess. If you had to hire me to do all of this for you, we probably could triple that number. I'm glad we knew how to do this; otherwise I'd have been happy to spend the money!

The boys aren't here every weekend anymore; they're busy. And our daughter has a good job and her own place. We don't have to worry about five-in-the-house very often. But that little powder room gets used every single day. I can't even imagine doing without it again. It just might be the best small project we've ever done. 
_______________________________________________
One thing we figured out a bit later on: tiny bathrooms need ventilation! See the chimney chase on the drawing, above? We cut-in a natural "cold air return" there, and finally got some airflow in the room. My wife thanks me...

Wednesday, December 01, 2010

Here's how you can lay out tile like a professional - Part One

by Jim Bessey

"Proper prior planning prevents piss-poor performance" --common business adage

tricky bath floor tile layout
View from the doorway--a tricky bath tile layout!
Laying ceramic tile can be a good DIY project. However, before you lay a single tile you need a good tile layout. Some will say you can do this on graph paper. As a professional tile installer, I politely disagree. Paper layouts are no match for an empty room, properly prepared, and the real tiles scattered on the floor in front of you. Ever heard the saying, "proper prior preparation prevents project problems"? This counts double for laying tile.

The beauty of tile is that it's not a fragile sheet good, or a warpy wood product. You can 'play with it' like Lego, shuffling the pieces around until you have them just right. No cardboard templates are required, and you don't have to sort out the bad pieces (usually, anyway). Each tile will generally vary by no more than 1/32" - close enough to make tiles interchangeable.

Where should you start?
You don't want to get halfway through the job and find yourself two tiles short.
Make rough measurements first, on graph paper if you like, and be sure you have enough tile purchased to complete the job. Always allow no less than 10% for potential cuts and waste. You don't want to get halfway through the job and find yourself two tiles short. For one thing, you'll have a difficult time matching the tile lot for small quantities. Mixed-lot tiles can sometimes stand out as if they were a different color, so don't risk it.

Begin with an empty room, free of clutter and vacuumed clean. Typically, remove all existing baseboards. Same for adjacent hallways, if your tile will continue there, too. Have your backer board (or similar tile underlayment) ready and handy, but uninstalled. You'll want to be sure that backer joints and tile joints don't coincide. The only way to know this is by laying out your tile in advance. Decide your grout joint size based on personal preference, and have spacers available. These are cheap, and go a long way toward producing professional results...  keep reading

Reprinted from the original on Helium.com  copyright 2010 - Jim Bessey
. Read Jim's profile at Helium 
  _______________________________________________
See this story as it appears on Helium.com 
     For more How-To Guides, see our new How To page, hosted here.

Saturday, November 20, 2010

Toilet Repairs: How to fix a troublesome toilet

by Jim Bessey

Troubleshooting common toilet problems

Not a single fixture or appliance in our homes is more crucial to our sanity than the lowly toilet. We expect our commodes to work every time, and we cringe with foul distaste when one fails in its humble mission. Yet a malfunctioning toilet must be fixed post-haste! If the kitchen sink is clogged, that can wait. Not so the potty. And it's all so distasteful: it's damp, perhaps a bit moldy inside, fouled by unspeakable germs and vile gunk no human should touch. The thought of calling a plumber, however, conjures visions of an exorbitant and illegible bill for emergency service.

Here are three secrets, revealed: First, you probably can repair that mis-behaving toilet yourself. Second, toilets aren't nearly as complicated as you fear. And last, except in the case of a truly disturbing overflow of the bowl, your toilet is much cleaner than you might expect. On the other hand, your fears of a pricey service call are well-founded. It's not at all unusual to pay almost $200 for a plumber's visit. For about $50 more than that, you could have a new toilet installed. It's worth your time, worth overcoming your reluctance, to at least give it a look.

Anatomy of the common toilet (U.S. design, residential):

Bird's-eye toilet view
Starting at the top: THE TANK. Although there are endless variations in shape and size, every commode has a water reservoir, usually a separate tank that holds ordinary tap-water used for flushing. A pipe emerges from the wall or floor nearby; most often you'll find a shut-off valve (with a small handle of some sort), which leads fresh water through a supply tube up to the tank. [Some tanks are cast as a unit with the bowl. This is a designer trick which makes repairs and replacement deliberately more expensive.]

Below the tank: THE BOWL. This part of the commode holds a second reservoir of water, necessary for effective flushing and for sealing off the sewer line from the air in your home. Most of us believe the toilet bowl to be hopelessly contaminated with exotic microbes. Unless you never clean it, that simply isn't true. Your kitchen sink almost certainly harbors more hazardous germs, especially if you have a garbage disposal.

The bowl covers the critical DRAIN. This is an two- to four-inch opening in the floor, leading directly to your main sewer or septic line. A clogged drain line doesn't even involve the toilet fixture itself; the problem's in the pipes. If your trouble lies in the drain line beneath the floor, that's the right time to call a plumber.

Things that can go wrong, and can be fixed:

Your shut-off valve can become clogged over time. If the tank seems to take an eternity to fill, the valve may need replacement. There's a second shut-off inside the tank, too: the one that sometimes doesn't stop running after you flush. For most toilets, that part costs less than $20 to replace. A typical brand of tank-filler is "Fluid-Master," sold in every hardware store. If you can shut-down either your water main or the valve with the handle below the tank, then you can do this job yourself. Cures most slow-fill or won't-stop-running issues.

Sometimes the "flapper" fails to function. In this case, water continually seeps or gurgles into the bowl (possibly wasting hundreds of gallons a week). Jiggling the handle is a common short-term solution. However, while the flapper's design varies from brand to brand, most home-owners can handle replacing that part themselves. Turn off the toilet's water supply for this chore, too.

The most humbling and distasteful problems come when the drain becomes clogged. If your handy plunger fails to clear the clog, go ahead and call a plumber. You could try "snaking" the drain yourself, but that's not a job for the faint-of-heart. Clogged drains can usually be blamed on some variation of "too much toilet paper." Prevention, and education of blissfully ignorant family members, is the only way to avoid recurrence.

The critical point: try not to be afraid. It's only a toilet. You don't have to be a rocket scientist to show the commode who's boss.


  Reprinted from the original on Helium.com.   copyright 2010 - Jim Bessey 
Read Jim's profile at Helium.com 
_______________________________________________
See this story as it appears on Helium.com 
    For more How-To Guides, see our new How To page, hosted here.

Saturday, October 23, 2010

DIY Tile Pic of the Week: Tile Shower Base

By Jim Bessey, editor

When you want an all-tile shower enclosure, there's no substitute for the real thing and no shortcuts to great results. 

2 by 2 porcelain tiles imitating an earthy "wood" look make a great pattern
Most of our ceramic tile shower remodeling projects use some type of high-end precast base, rather than real tile as pictured here. Why? Because forming and installing a ceramic or porcelain tile shower base is a real pain in the behind. Not only that, it's very easy to make a crucial mistake that will be very difficult to address when the inevitable leak emerges days or weeks later.

On the other hand, none of those expensive cast bases can even attempt to imitate the beauty of an all-tile base. Unfortunately, the best way to achieve results like this uses methods alarmingly similar to those of the original Roman Spa builders. A good DIY tile project? Not really; but if you're patient and aren't afraid to work with water-proof membrane, mortar mix, thinset, and ceramic (or porcelain) tile -- well, it's a job you can do one step at a time, carefully. 

We'll talk about that process in a future column. I've included a number of more basic DIY Tile Tips in earlier posts.
 _______________________________________________


What tile projects have you tried? Your ideas for future posts and pictures are always welcome. For more tile information, see my DIY Tile Zone, hosted on Helium.

Tuesday, June 08, 2010

Ceramic tile: Tips for choosing the right size for your project

It's just as true for tile: "size matters"

by Jim Bessey

tile tub surround uses four tile sizes for effect
how many tile sizes do you see here?*
What's more fun than doing a tile job? - choosing the tile!

Shopping at tile stores is a sensory experience. So many shapes, sizes, textures, patterns and colors to choose from; it's enough to make you dizzy. At first it's easy:

"Love that! Love those! No way I'd use them!" But then comes, "- oh, I like those, too. These would look great in our bathroom. So would these, over here."

And that's just in the first five minutes of browsing the tile displays. When you consider the combinations and permutations, there are actually more tile choices than there are paint colors at Sherwin-Williams. One way or another, you have to...

Narrow the field.

Most folks start with a color scheme and a budget. That cuts the possibilities by at least half. Still leaves a couple thousand potential selections. Move on to texture: smooth or "natural" surface? Glossy or matte finish? Now you're down to just a few hundred possible tiles.

Size matters... keep reading

copyright 2009 Jim Bessey - all rights reserved ~ Reprint rights available at Helium.com
_______________________________________________
This guide to choosing tile sizes for your DIY tile projects recently tied for second place in Challenge 21: Your best advice, hosted in Betaville on Helium.com. 
Your can find more tile advice from Jim and other Helium authors on the DIY Tile Zone, also hosted in Betaville. See this story as it appears on Helium.
If you have pictures of a recent DIY tile job you completed, contact me by Comment or email to share them here on K&B by D'Zyne.

* answer: there are four distinct tile sizes shown in the picture: 12x12, 6x6, 2x2, and 12" by 1" gold metallic 'rope' as an accent band edging. The tiles laid diagonally are the same 6x6's as in the horizontal row below the accent band.

Saturday, June 05, 2010

Adventures in tub tile: Fun with shapes and accent pieces

Photo by Jim Bessey
tile tub surround uses FOUR tile types!
Four distinct tile sizes and types combine for a stunning design
 Late last fall we tackled a tricky bathroom filled with interesting tile, including the tub surround pictured above. The central design uses 13"-square porcelain tiles with some rather aggresive shading and swirling. The designer added the same selection in a 6"-square for accent, then went even farther by including a gold-metallic border rope surrounding a 2-by-2 mosaic band. Next, above that accent band is the final touch -- the same 6-by-6 tiles laid diagonally.

Is this design too busy for your eye? The homeowner loved it, and was pleased with my attempts at both random and small-pattern layout. This is demanding work, using so many sizes and placements of different tiles in the same small area. You have to be careful doing this sort of design because you know that people will be looking closely every time they shower! (One of the 6-by6 tiles actually had to be chiseled out and replaced due to a minor but noticeable spacing issue -- that wasn't fun at all.)

Photo copyright 2010 Jim Bessey * Reprints with attribution, unaltered.
_______________________________________________
Want to know more about ceramic and porcelain tile for floors, walls, tubs and showers? See my DIY Tile Zone hosted on Helium.com

Friday, June 04, 2010

Bathroom floor tile adventures: "I see patterns ... everywhere?"

Forming floor tile patterns can be risky business --

Our customer's initial response was "rip it all out!" I'm not kidding. Then the homeowner thought about it overnight. This bold pattern was permitted to stay put.

12x12 floor tiles in pattern
Rarely does a ceramic or porcelain floor tile lend itself to pattern-forming as well as this one. A large majority of installations call for careful randomizing (which certainly does sound like an oxymoron). Most tile instructions insist upon box-mixing and random rotation of each tile, or conversely require that the tiles maintain a given orientation specifically to avoid patterns.

close-up of floor tile pattern
tiles combine light and dark shading
This tile was different. It's shading and pigment variation was so pronounced that it was easy to visualize a wild assortment of pattern-matching. My design may have started accidentally, but once my eye saw a way to create floor-art I had to keep going. Of course there was an inherent risk in laying the tile artistically -- the homeowner was dead serious in his original dislike of the results.

zoom-in on floor tile pattern
closer view of 8-tile pattern
Notice that it took eight full tiles to form the base image for this floor. That's a lot of tedious tile selecting. Then, in order for the concept to "work" I had to keep going -- a similar yet complementary image is formed to the left, and is partially covered by the toilet and vanity. However, if there had not been a way to continue the theme, I'd have had to abandon the idea.

I'm not sure how well this earthy sandstone tile would have looked "randomized." With such enormous variation and contrast in tone it would be tough to achieve something that looked 'unplanned.' Some of these tiles actually display a mirror-image of another tile -- a visual stunt that can ruin any attempt at non-patterned designs.

shower tile floor and walls checker-board
Large & small tiles using random mix
One of our more recent tile jobs also used an extravagantly-varied tile surface; each tile seemed to have 'grain' and this had to be taken into account. In this case, we all agreed it was important to use two methods to randomize the overall tile image -- we used 'checker-boarding' and made sure that similar tile faces were never adjacent (which might sound easier than it is in practice). Notice how crucial the lack of patterning becomes for the 2x2 shower floor tiles.

Whether your floor tile lends itself to patterning or not, it's always smart to mix boxes and dry-set a large area just to see how the finished work will look. This is also an easy way to double-check your intended layout for cutting or other visual problems. Good planning makes for great results.

copyright 2010 - all rights reserved * photo reprints with attribution, unaltered
 _______________________________________________
Would you have insisted on having the patterned design removed? Would you even consider buying a tile with this much variation in shading? How do you like the wood-look tiles, laid in a checker-board pattern -- too eye-boggling? 

If you'd like to learn more about home tile applications, have a look around at the DIY Tile Zone hosted on Helium.com. See also:  A Hard Look At Ceramic Tile.: An article from: Flooring

Thursday, June 03, 2010

Tile tub surrounds: Finding your niche

Tub surround tile niches are cool, and each is unique.

Niches are formed using an opening in the wall, a manufactured metal "pan," and a variety of tiling methods to blend with or accent the rest of the tub-area tile work.

Why choose a niche, versus other types of soap dishes and shelving? Design and aesthetics give niches the first-place vote. They do not intrude on the tub's space, and they don't interrupt the flow of the tile the way corner shelves do.

On the other hand, a niche adds substantial cost to the job -- mostly in added labor. One niche can easily add an entire day's work to a five-day job. There's extra time spent on careful layout, more time in cutting and re-framing the opening, hours more added for tile cutting (usually more than 20 added cuts!), and more time lost while grouting and caulking. It all adds up; but the pay-off is so high... well, just look at these pictures!


elegant tile niche

Simple and elegant: this one combines a partial picture-frame effect with interior bullnose finish, all using the same tile selection and carrying layout lines cleanly through the niche. For accent, this homeowner designed a band of two-by-two tiles just above the niche frame.

basic tile niche

Even simpler: this niche displays no picture-frame effect and blends beautifully with the surrounding tile. Notice how the grab bar aligns perfectly with the centered niche.

fancy tile niche

Jazzy and artistic: one of our most recent, this is also the most complicated. It uses a double-picture-frame design and adds smaller accent tiles in the back wall for an eye-popping finished product. The accent band above the niche uses a third ribbon-tile of the same finish.

modified niche design

Blending styles: our final example uses a modified picture-frame with a 'window sill' effect, and also includes accent tiles applied to the back wall. Notice the matching band of these same accent tiles at eye level. The accessory you see below the niche is a preformed corner seat.


Tiling a tub surround and adding an integral niche is typically beyond the skills of do-it-yourselfers.

When you're contracting professionals to do a job like this, however, it's nice to know you have plenty of choices. In addition, once you have an idea of the extra work involved, you might not be quite as easily shocked at the prices quoted. Keep in mind that a tile niche can be expected to last 30 to 50 years, same as the rest of the tiling in your remodeled bathroom.

All photos copyright 2010 by dzyne -- reprint with attribution please. _______________________________________________
Which niche looks best to you?  Do you prefer the simplistic approach, or like it better when the niche becomes a design focal point?

If you've had your bathroom remodeled using ceramic or porcelain tile and would like to share a picture of it here, please contact me via comments or my email link. If you'd like to learn more about tile topics, see our companion DIY Tile Zone hosted by Helium.com.

Saturday, September 12, 2009

Big tiles or small: which tiles are "just right" for your project?

What's more fun than doing a tile job? -- choosing the tile!

Shopping at tile stores is a sensory experience. So many shapes, sizes, textures, patterns and colors to choose from; it's enough to make you dizzy. At first it's easy:

"Love that! Love those! No way I'd use them!" But then comes, "-- oh, I like those, too. These would look great in our bathroom. So would these, over here."

6 x6 tile floor and white subway tile walls
And that's just in the first five minutes of browsing the tile displays. When you consider the combinations and permutations, there are actually more tile choices than there are paint colors at Sherwin-Williams. One way or another, you have to...

Narrow the field.

Most folks start with a color scheme and a budget. That cuts the possibilities by at least half. Still leaves a couple thousand potential selections. Move on to texture: smooth or "natural" surface? Glossy or matte finish? Now you're down to just a few hundred possible tiles.

Size matters.

Tiny, small, medium, large or giant -- which one feels just right to your eye? Many popular tile offerings are available in every size, from one-inch mosaics to 16" platters. That allows the tile manufacturer please a large range of customers. Let's ignore all those other options, and consider this question partly from the do-it-yourselfer's point of view.

Each tile size has a reason for its existence. Some trace their origins back to the Roman Baths and Ancient Greece. Other sizes were standardized during the post-war building boom. Still more were created to suit the appetites of modern mall builders, who wanted to cover larger areas with fewer tiles. The rest exist simply because they are aesthetically pleasing.

Here's the run-down:

  • Tiny tiles: Sheeted mosaics offer intriguing patterns of color and shape. They're easy to work with in most cases, because they require less difficult cutting. Typical sizes include one- and two-inch squares as well as similarly-sized octagons or hexagons. (The latter are more difficult to cut and fit.) Small tiles are often best for small spaces like kitchen counter top backsplashes or powder room floors, or for use as inset borders. In addition, web-mounted tiles allow the manufacturer to create intricate patterns that wouldn't work well with larger tiles.
  • "Subway tiles" (see photo) are usually glossy rectangles in a specific proportion: 2 to 1 or 3 to 1, as well as 5 to 3, are typical (but certainly not the only choices). These classic tiles make an elegant choice for traditional walls. Matching base coves, outside corners and edging ("bullnose") trims are usually available for each color and finish. Subway tiles are almost always ceramic -- lightweight, inexpensive, self-spacing, and easy to work with.
  • Until recently, builders have preferred ceramic squares in 4" or 6" sizes (see photo). They chose earth tones or elemental colors for more universal customer appeal. These "simple squares" are low-cost and easy to cut and install. They can be self-spacing or moved apart for larger grout lines, as desired. Generally, even non-stock colors can be ordered on short notice. Because the geometry is straight-forward, these tile sizes lend themselves to "checker-board" designs or "picture-framed" border layouts.
  • Larger rectangles offer a visual change-up from more familiar tile patterns. Standard sizes include 4 x 6, 6 x 8, and 8 x 10 (inches). These non-square tiles look great laid vertically, horizontally, and even in "brick"-style patterns. While ceramics are readily available, medium-sized tiles like this are more often displayed in porcelain lines. Porcelain tiles are heavier, more durable, less absorbent -- and harder to work with -- than standard ceramics. Installers will usually use tile spacers and cement-based "thin-set" mortar for best results.
  • Big tiles start at 12" square and go up from there. One popular size is 13.5" square, which probably converts to some whole number of centimeters. Paver-sized tiles were once reserved for large rooms, commanding foyers, malls, and restaurants. Now they are one of the top choices by designers for contemporary homes. Large and giant tiles are heavy, expensive, subject to shipping damage, and more difficult to install.
  • Preparation becomes critical as tile dimensions increase. DIY-level tile saws are often too small to accept these products for cutting. Layout can be tricky, to avoid weird edge-cuts and ungainly "L"s around corners. On the other hand, these (usually porcelain) tiles are incredibly durable, even for outdoor use. And they're gorgeous.
Which size is right for you? Consider room size, the level of complexity for layout (smaller tiles make layout easier, in general), and your skill level. In the end, your choice of tile size comes down to what "feels right" to you. Maybe you'll know it when you see it. When you consider all your options and choose the one that feels just right for you, you'll still be saying "I love it!" when the job is complete.

copyright 2009 - all rights reserved. Reprints available upon request.
_______________________________________________

For more information about tile floors and walls, have a look at the DIY Tile Zone in Betaville, at Helium.com. If you have questions or other feedback, please leave a comment here or on the tile zone.

Tuesday, March 17, 2009

DIY Tile Pic of the Week: Find your tile niche

A custom tile niche evokes classic Roman charm in a bathroom.

custom tile niche When you choose tile for your bathtub or shower makeover, you might want to consider including a classic tile niche. This is not a project for the uninitiated! However, for design harmony and beauty, it's hard to beat.

The project shown used 12" by 12" porcelain tile, 3/8" thick -- not an easy tile to cut or install. Choosing a smaller, thinner ceramic tile reduces the level of difficulty significantly.

Typical "soapdish" accessories are single molded ceramic or "cultured marble" items that you purchase and install. This usually involves cutting two to six field tile (the standard tile used) to fit around the installed fixture. You might have to cut a hole in the wall and use some silicone caulk; but that's usually the extent of it.

As you can see from the image, a tile niche demands far more cutting, fitting, and finish (grouting) finesse. This fixture took the place of four 12 x 12 field tiles; each of these had to be carefully cut (last) to fit around the indented area. All tiles used in the niche follow the grout lines for the containing wall. Notice how critical the placement of the niche within the field tile is, in this case.

Add them up, then: there are 24 distinct cut tiles used in this installation. (That's more than 24 cuts, since some tile pieces required two cuts.) The picture-frame border you see was composed of bull-nosed edging tiles, with the eased edge facing inward. This prompted eight mitered cuts which had to be carefully fitted.

Grouting an inset tile fixture is more difficult than finishing around a protruding soapdish, too. More care has to be taken with the original fit and with the grouting itself, since every joint shows. This is not a place to be "off just a little"!

You might ask, "why bother with all this extra effort?" The answer appears just below the subhead for this post, and is worth a thousand more words.

DIY tile pic for week of Mar 16 2009

copyright 2009 - all rights reserved
_______________________________________________

See this photos like this featured along with all sorts of other related ceramic tile information and articles on the new DIY Tile Zone at Helium.com.

If you have a DIY tile pic that you'd like to share, please leave a Comment here. If I use your picture, I'll link to your blog or website. ~Jim

Thursday, February 12, 2009

DIY Tile Pic of the Week: Natural stone shower walls

Walk-in shower uses natural stone squares in 6 by 6


natural stone shower walls in 6 by 6

This 44" by 32" shower, completed just before the New Year, features slate tiles from Home Depot. Grout lines are 3/16", to showcase each tile.

Natural stone is one of the more difficult products to install. Each 6" by 6" piece is unique. Thickness, especially, varies quite a bit - from nearly 1/2" to barely more than 1/8". Some tiles aren't exactly square, and others have one or more "missing" corners. Proper installation calls for careful attention to sizing, spacing, orientation, and color/texture.

This is a great way to express your individuality. No two installers will put these tiles together the same way, so even "identical" projects won't be. Some slates are very jazzy, while others much less interesting. Deciding how to showcase the fancier ones makes all the difference.

This wall material should be sealed prior to installation, for best results. Grout loves to stick in the nooks and crannies of any natural stone tile. For a wet area like this, sealer is even more important. Because they don't have the typical glasslike finish of ceramic or porcelain tile, stone tiles are more difficult to keep clean.

Are the results - a beautiful and unique design - worth the extra effort and maintenance? That's a personal choice; only you can decide for yourself.

DIY tile pic for week of Feb 12 2009

copyright 2009 - all rights reserved
_______________________________________________

See this photo featured along with all sorts of other related ceramic tile information and articles on the new DIY Tile Zone at Helium.com.

If you have a DIY tile pic that you'd like to share, please leave a Comment here. If I use your picture, I'll link to your blog or website.

Friday, January 30, 2009

DIY Tile Tip of the Week #4

Buy clearance tile to save money:

buy clearance tile to save money I love ceramic tile, but it sure can be expensive. There's such an incredible price range, from about a dollar per square foot to $50 a foot and more. I'm a cheapskate at heart, so I've never paid full price for tile I've installed in my house.

Did you know that most tile retailers have Clearance Tile on hand regularly? With so many tile choices, these smaller stores don't usually stock much tile. It's all special-ordered from larger wholesalers. So what happens when orders get cancelled, or don't get picked up? What about when customers return a box or two that turned out to be "extra"? That's how tile clearance land happens. It's just too expensive to ship heavy tile back for credit most of the time.

This same "we don't want to ship it back" attitude is true for some tile installers, too. We have a huge rack filled with orphaned boxes of tile in the shop I work for. This tile can be bought for pennies on the dollar.

Even the big box stores like Lowes and Home Depot sometimes offer deep discounts on their ceramic tile inventories. When they discontinue a style and get down to just a few boxes, they want that tile GONE. You have to be careful that there's enough square footage to cover your project, but the savings are major.

What could you do with just a box or two of tile you find deeply discounted?

  • A fireplace surround

  • A bathroom accent area over a vanity

  • A small foyer - mix and match for a larger foyer

  • A fancy bathroom vanity top

  • A cool tile inlay coffee table

  • A small section of backsplash for your kitchen, maybe just behind the stove
With an open mind and a sharp eye you can find some great bargains on formerly-expensive tile for your next project. Or find some interesting tile first and dream up a project to fit. Let your imagination run wild with really cheap tile!

This is Tip #4, Jan 29 2009

copyright 2009 - all rights reserved
_______________________________________________

See this tip [coming soon], and all sorts of other related ceramic tile information and articles on a brand new DIY Tile Zone at Helium.com.

If you have a DIY Tile Tip that you'd like to share, please leave a Comment here. If I use your tip, I'll link to your blog or website.

Thursday, January 08, 2009

DIY Tile Pic of the Week: Tiny tile floor

Foyer powder room floor is small but eye-catching

small powder room, fancy tile

Our very latest DIY tile job was one of the smallest floors I've ever done, for our brand new powder room. We used left-over ceramic tiles from a couple previous jobs, blending them for a unique effect.

With less than 16 square feet to cover, this project called for simplicity. We hoped to achieve a touch of elegance, while blending this new tile floor into our existing tile foyer. Each area uses shades of brown and tan, and features large (12" square or 13" square) tiles accented with much smaller tiles.

The foyer pattern uses two accent tile sizes in a symmetrical diamond pattern - much too busy for the new powder room. We thought at first to make a basic inset border using the brown tiles. Even this was too much, so we opted for an asymmetric "L"-shaped design instead. Bull-nosed base ("splash") tiles in a shade between the two colors used brought it all together.

The wall tiles you can see in the picture are the same color and type as the large floor tiles, but much smaller. We used the minimum width grout lines for those, and chose "alpine white" for grout, to compliment rather than match the floor's "mocha" grout selection.

The finished job has a regal Tudor feel to it, without being overbearing. What do you think? Good choice, or still over the top for such a tiny room?

DIY tile pic for week of Jan 5 2009

copyright 2009 - all rights reserved
_______________________________________________

See this photo [coming soon], and all sorts of other related ceramic tile information and articles on a brand new DIY Tile Zone at Helium.com.

If you have a DIY tile pic that you'd like to share, please leave a Comment here. If I use your picture, I'll link to your blog or website.

Thursday, January 01, 2009

DIY Tile Tip of the Week

USE SPACERS:

Tavy tile spacers stock image For perfect layout every time, with uniform spacing of your tiles throughout, use Tavy Tile Spacers to separate tiles. These simple and reusable plastic tile spacers help you achieve professional-quality results on floors and walls.

Choose grout line sizes from 1/16" to 3/8." Different sizes use different colors to help prevent mistakes. Tavy Spacers are sold at Lowes and most pro-level tile retailers. Bags of about 100 (plenty for most jobs) sell for just under five dollars.

This is Tip #1, Jan 1 2009

copyright 2008 - all rights reserved
_______________________________________________

See this tip, and all sorts of other related ceramic tile information and articles on a brand new DIY Tile Zone at Helium.com.

If you have a DIY Tile Tip that you'd like to share, please leave a Comment here. If I use your tip, I'll link to your blog or website. Happy New Year!

Tuesday, December 02, 2008

Small bath gets a dramatic tile facelift

Updating a bathroom on a budget

bath floor uses diagonal tile pattern
One of our November projects found us leaving the tub and vanity in place, and using ceramic tile to bring a small bathroom into the new century. This customer's house size, style, and location precluded spending big dollars on the main bath. The homeowner, however, found a great way to use ceramic tile to upgrade his 30-year-old bathroom.

We removed the existing (dreary) vinyl sheet floor and laminate vanity top. The toilet was removed but set aside for re-use after work was completed. Even the original pine baseboard was carefully detached and saved for later. We added rock-solid DurRock brand tile sub-floor and a new 1 1/4" thick substrate for the new vanity top. All plumbing shut-offs were replaced, too.

While many of our remodelling jobs find us removing nearly everything - sometimes even the drywall - this project focused on adding beauty on a budget. Large floor tiles, 12 by 12 inches, set in a diagonal pattern create dazzling visual appeal in this small space. Laying the tile diagonally requires much more careful measuring and layout, and far more cutting time. The results, however, prove the payoff.

all new tile vanity top in chocolate The new ceramic tile vanity top, crafted completely on-site, uses color contrast and smaller tiles (6 by 6 inches) for dramatic effect. Chocolate-colored tiles and matching dark grout, plus the addition of an over-height back-splash, accent the pure white porcelain sink for a complete sink-top makeover. Notice how perfectly the correct nosing tiles form the top's edge.

Even a small bathroom can soak up more than $10,000 after all materials, labor and fixtures. Not every homeowner can justify this level of investment in a single bath. In this case, our customer settled on a lower budget and made the most of it. Few visitors would guess that this was a "low-budget" remodel.

copyright 2008 - all rights reserved
_______________________________________________

What money-saving ideas have you used to fix-up your kitchen or bathroom? Leave a comment here, or contact me via email if you have a creative project-budgeting story to add.

Sunday, October 26, 2008

Bathroom projects: A new ceramic tile floor

new ceramic tile bathroom floor
Our most recent weekend bathroom project transformed our hideous linoleum floor into a beautiful ceramic tile finish. With hours of help from my two handy sons, this chore started on Saturday and wrapped up Sunday afternoon. Good thing, too, since it's our only bathroom!

Bathroom floors take constant abuse from water, bare feet, and heavy traffic in general. Our original floor had gotten so ugly, and was so difficult to clean, that we generally closed our eyes on entering. In addition, the wood baseboard and shoe molding needed complete refinishing. I'm not sure what we could have done about the creepy smeared caulk around the perimeter. (Previous owner)

So what did we do about our icky floor? My youngest ripped out all the wood trim, and the three of us re-nailed the whole floor -- right through the old vinyl floor. We might have chosen to strip out all the existing floor materials down to the sub-floor, but that would've added another full day to the job. Since I'm the only one who has to guaranty this new installation, we cheated a bit. (Adding 1/2" DuRock or similar tile backer is a safer choice.)

The new tile we chose is very heavy, and imitates a weathered sandstone. Nice grip, and a dramatic three-dimensional look. Our new theme is "beach cottage" so this works perfectly. While it will be more difficult to clean than a smoother, shinier tile it adds enough character to the room to offset that concern.

We decided to use narrow (1/8") grout lines to emphasize the tile over the pattern, and to reduce the amount of exposed grout area. Grout stains much more easily than does tile, because it's so porous. We'll apply a sealer, but that's not a cure-all. The result, as you can see, is a floor that looks very much like an exposed sandstone shelf like you might find in a river or at a beach. Perfect!

copyright 2008 - all rights reserved
_______________________________________________

What's your opinion -- did we make a good decision? Do you think that a textured ceramic tile makes sense for a bathroom floor? Have a look at what we did to refinish our oak plank dining room floor for comparison.

Tuesday, October 21, 2008

Bathroom projects: Bugs in the tub!

bathtub walls hid a nest of black ants
Who knows what evil lurks behind a 30-year-old ceramic tile tub surround? I do! About half of my jobs involve new tile bathtub walls, mostly to modernize dated designs. Day one almost always involves some heavy lifting -- tearing out old walls and tubs and hauling the debris down a flight of stairs. It's hard work but generally routine.

The usual tools required are a saw, hammer, pry-bar (I have a really big one), and sometimes even a sledgehammer. But I don't usually need a can of Raid! When your old tile has missing grout, however, water can seep behind the tile and create a haven for certain bugs and mold or fungus. Moldy drywall behind the tile is pretty common, but finding a nest of ants lurking back there is (thankfully) rare.

close-up of ant colony found behind bathtub
The mess shown in this close-up shot is all cleaned up now, but it was touch and go there for a few minutes. I don't carry bug spray, and so had to hastily search my customer's basement shelves for a remedy. Those little critters were extremely healthy and mobile. They would've spread far and wide if I hadn't come up with a quick cure.

When I've finished this job I'll stop back and post the after picture. This time I can safely guaranty "major improvement"!
_______________________________________________

Have you ever found something scary hidden behind the walls during a remodel project? Or have you discovered a long-lost treasure under the floorboards? Leave a comment here or contact me via email if you'd like to share your find.

Thursday, October 09, 2008

Projects: Ceramic tile and air-jet tub

Our most recent big bath project had us install a new air-jet tub with a gorgeous ceramic tile tub surround. We replaced the owner's original, dysfunctional whirlpool-style tub and tile combination with all new product, including the faucet and fittings, and a polished brass shower door.
ceramic tile tub surround over air-jet tub The tile is a tradional, glossy 8 by 10 with an inset border. Installation included two ceramic corner shelves and a center soap dish. Grout lines were held at just one-eighth inch to emphasize the tile itself, rather than the pattern.

ceramic tile surround with inset border tiles over air-jet tub This second image is a bit tricky. It's a shot of the right end of the tub, with the fixture (left) end reflected in the sink area mirror. This project took about eight man-days, and involved no less than one hundred trips up and down the main stairs.

Saturday, September 27, 2008

If you think it's tile, but it's not...

...it's linoleum!

linoleum looks like tile in powder room remodel
Not every customer wants a new tile floor, and it isn't always about budget.

This week's powder room makeover called for an Armstrong vinyl floor that the homeowner had carefully selected after much consideration. Her kitchen floor was linoleum, too, and had held up beautifully over time. Since the powder room is right across the hall from the kitchen, it made perfect sense to match and compliment the existing surface.

There was a glitch in the process, when my customer's selected floor wasn't available immediately (one-day order time), but we worked it out. I had to do some serious advance work to make sure that everything was ready to go. Usually the floor goes in right after lunch on Day One. This time, it didn't get installed until the middle of Day Two.

Day Two was also the final day! How often can you do a powder room makeover in just two days? Well, please don't ask me to do it again any time soon. I didn't spend much time sitting around, and the second day lasted until almost dark.

Despite the glitch, this room was ready for fresh paint just in time. Have you ever tried to reschedule a professional painter on one day's notice? Don't bother. We stayed on schedule and got the job done in the end. I'll stop back next week to install a couple missing fixtures; other than that, it's a wrap!

Sorry, that flash-picture doesn't do the job justice. Too much glare off the vinyl floor. But you get the idea. With fresh paint all around (not pictured), this little room looks very nice indeed.