Creating kitchens and baths for finicky customers since 1993


backsplash features inset metal tiles for accent and texture

Thursday, June 17, 2010

How to install ceramic tiles next to other surfaces: comment and follow-up

What happens when ceramic tile meets carpet or hardwood?

ceramic tile uses metal edge transition to carpet
Today's design trends call for a mixture of flooring choices in our homes. This inevitably leads to tricky transitions between ceramic tile and other flooring materials. We began this discussion some weeks ago with this advice article:

How to install ceramic floor tiles next to wood flooring

Readers were quick to comment, probably because there is always more than one way to address these unlike-materials transitions.

Floor tiles guy said... Great article, it would be great to see a follow up article on advice with what to do when you are tiling from your kitchen up against a carpeted surface. Thanks 

Robert said...  Floor tiles are commonly used in home renovations today. Your post discussed the two possible scenarios when tiles are installed beside hardwood flooring. Among the two cases, the one with uneven levels is problematic. I agree with Floor tile guy that a follow up about repairs in those instances would be very useful to your readers.

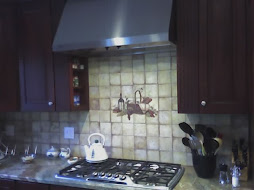
In our case, spared us of such problems when we renovated our house. We have a maple hardwood flooring for the living area and used ceramic (Brandon) tiles for the kitchen. The floor looked neatly done because we had ample time to plan and discuss details like sub-floor foundation. In any case, a renovator must be very keen on details like measurements of the sub-floor and thickness of the tile to achieve a fairly even floor for his house. 


"Fairly even" is the key to making good tile transitions. Robert is exactly right.

The minimum recommended thickness for ceramic tile installation is about 5/8" -- and that's using a minimal 1/4" tile backer-board or the newer Ditra-brand substrates from Schluter. Fortunately, this thickness works well with most installed carpeting.  Typically, carpet plus padding adds up to about 5/8" -- although the type of carpet and the thickness of the selected pad can vary this measurement.

When tile and carpet are of nearly identical heights, you can use marble thresholds (bathroom) or simple square-finish tile edges. In both cases the carpet is stretched and tucked using the standard tackless strip. If the carpet is somewhat higher than tile, Schluter offers stepped edges to 'clamp down' thick carpeting.

Many times, however, porcelain tile installed over a thicker substrate like 1/2" Durock from USG will add up to a floor that's nearly one inch thick, not including the original house subfloor. That extra thickness puts the finish tile substantially higher than the nearby carpet. In this case, you have a couple of good choices:
  1. Use a "Hollywood" style marble threshold, which has a long bevel on one side to lead back down to carpet level. This works fine in a Master Bath off a carpeted bedroom, for instance.
  2. In high visibility common areas, a better choice would be a ramped metal Schluter edge (as mentioned in the original article about transitioning to hardwood floors). You could even consider a softer plastic-edge for a more subtle effect.
As Robert mentions, when you have time and opportunity to plan ahead, you can adjust all the flooring selections so that they'll add up to similar numbers. For stronger, modern subfloors you can use the thinner tile substrates to avoid high-tile problems.

Or, attacking the problem from the opposite direction, make the carpet thicker! It's easy and relatively inexpensive to add 1/4" to carpet thickness, merely by first installing basic luan underlayment before carpet is installed.

With tile transitions, as with so many things in life, the best answers usually come down to proper planning and preparation. Taking a little extra time to look ahead before you begin the installation -- and also to consider using specialty products designed for tricky situations -- can mean the difference between mediocre results and professional finishes.

copyright 2010 - all rights reserved * reprints upon request
 _______________________________________________
What tile problems have you encountered? Your ideas for future posts and pictures are always welcome. For more tile information, see my DIY Tile Zone, hosted on Helium. 
See the earlier article as it appears on Helium.com

Tuesday, June 08, 2010

Ceramic tile: Tips for choosing the right size for your project

It's just as true for tile: "size matters"

by Jim Bessey

tile tub surround uses four tile sizes for effect
how many tile sizes do you see here?*
What's more fun than doing a tile job? - choosing the tile!

Shopping at tile stores is a sensory experience. So many shapes, sizes, textures, patterns and colors to choose from; it's enough to make you dizzy. At first it's easy:

"Love that! Love those! No way I'd use them!" But then comes, "- oh, I like those, too. These would look great in our bathroom. So would these, over here."

And that's just in the first five minutes of browsing the tile displays. When you consider the combinations and permutations, there are actually more tile choices than there are paint colors at Sherwin-Williams. One way or another, you have to...

Narrow the field.

Most folks start with a color scheme and a budget. That cuts the possibilities by at least half. Still leaves a couple thousand potential selections. Move on to texture: smooth or "natural" surface? Glossy or matte finish? Now you're down to just a few hundred possible tiles.

Size matters... keep reading

copyright 2009 Jim Bessey - all rights reserved ~ Reprint rights available at Helium.com
_______________________________________________
This guide to choosing tile sizes for your DIY tile projects recently tied for second place in Challenge 21: Your best advice, hosted in Betaville on Helium.com. 
Your can find more tile advice from Jim and other Helium authors on the DIY Tile Zone, also hosted in Betaville. See this story as it appears on Helium.
If you have pictures of a recent DIY tile job you completed, contact me by Comment or email to share them here on K&B by D'Zyne.

* answer: there are four distinct tile sizes shown in the picture: 12x12, 6x6, 2x2, and 12" by 1" gold metallic 'rope' as an accent band edging. The tiles laid diagonally are the same 6x6's as in the horizontal row below the accent band.

Saturday, June 05, 2010

Adventures in tub tile: Fun with shapes and accent pieces

Photo by Jim Bessey
tile tub surround uses FOUR tile types!
Four distinct tile sizes and types combine for a stunning design
 Late last fall we tackled a tricky bathroom filled with interesting tile, including the tub surround pictured above. The central design uses 13"-square porcelain tiles with some rather aggresive shading and swirling. The designer added the same selection in a 6"-square for accent, then went even farther by including a gold-metallic border rope surrounding a 2-by-2 mosaic band. Next, above that accent band is the final touch -- the same 6-by-6 tiles laid diagonally.

Is this design too busy for your eye? The homeowner loved it, and was pleased with my attempts at both random and small-pattern layout. This is demanding work, using so many sizes and placements of different tiles in the same small area. You have to be careful doing this sort of design because you know that people will be looking closely every time they shower! (One of the 6-by6 tiles actually had to be chiseled out and replaced due to a minor but noticeable spacing issue -- that wasn't fun at all.)

Photo copyright 2010 Jim Bessey * Reprints with attribution, unaltered.
_______________________________________________
Want to know more about ceramic and porcelain tile for floors, walls, tubs and showers? See my DIY Tile Zone hosted on Helium.com

Friday, June 04, 2010

Bathroom floor tile adventures: "I see patterns ... everywhere?"

Forming floor tile patterns can be risky business --

Our customer's initial response was "rip it all out!" I'm not kidding. Then the homeowner thought about it overnight. This bold pattern was permitted to stay put.

12x12 floor tiles in pattern
Rarely does a ceramic or porcelain floor tile lend itself to pattern-forming as well as this one. A large majority of installations call for careful randomizing (which certainly does sound like an oxymoron). Most tile instructions insist upon box-mixing and random rotation of each tile, or conversely require that the tiles maintain a given orientation specifically to avoid patterns.

close-up of floor tile pattern
tiles combine light and dark shading
This tile was different. It's shading and pigment variation was so pronounced that it was easy to visualize a wild assortment of pattern-matching. My design may have started accidentally, but once my eye saw a way to create floor-art I had to keep going. Of course there was an inherent risk in laying the tile artistically -- the homeowner was dead serious in his original dislike of the results.

zoom-in on floor tile pattern
closer view of 8-tile pattern
Notice that it took eight full tiles to form the base image for this floor. That's a lot of tedious tile selecting. Then, in order for the concept to "work" I had to keep going -- a similar yet complementary image is formed to the left, and is partially covered by the toilet and vanity. However, if there had not been a way to continue the theme, I'd have had to abandon the idea.

I'm not sure how well this earthy sandstone tile would have looked "randomized." With such enormous variation and contrast in tone it would be tough to achieve something that looked 'unplanned.' Some of these tiles actually display a mirror-image of another tile -- a visual stunt that can ruin any attempt at non-patterned designs.

shower tile floor and walls checker-board
Large & small tiles using random mix
One of our more recent tile jobs also used an extravagantly-varied tile surface; each tile seemed to have 'grain' and this had to be taken into account. In this case, we all agreed it was important to use two methods to randomize the overall tile image -- we used 'checker-boarding' and made sure that similar tile faces were never adjacent (which might sound easier than it is in practice). Notice how crucial the lack of patterning becomes for the 2x2 shower floor tiles.

Whether your floor tile lends itself to patterning or not, it's always smart to mix boxes and dry-set a large area just to see how the finished work will look. This is also an easy way to double-check your intended layout for cutting or other visual problems. Good planning makes for great results.

copyright 2010 - all rights reserved * photo reprints with attribution, unaltered
 _______________________________________________
Would you have insisted on having the patterned design removed? Would you even consider buying a tile with this much variation in shading? How do you like the wood-look tiles, laid in a checker-board pattern -- too eye-boggling? 

If you'd like to learn more about home tile applications, have a look around at the DIY Tile Zone hosted on Helium.com. See also:  A Hard Look At Ceramic Tile.: An article from: Flooring

Thursday, June 03, 2010

Tile tub surrounds: Finding your niche

Tub surround tile niches are cool, and each is unique.

Niches are formed using an opening in the wall, a manufactured metal "pan," and a variety of tiling methods to blend with or accent the rest of the tub-area tile work.

Why choose a niche, versus other types of soap dishes and shelving? Design and aesthetics give niches the first-place vote. They do not intrude on the tub's space, and they don't interrupt the flow of the tile the way corner shelves do.

On the other hand, a niche adds substantial cost to the job -- mostly in added labor. One niche can easily add an entire day's work to a five-day job. There's extra time spent on careful layout, more time in cutting and re-framing the opening, hours more added for tile cutting (usually more than 20 added cuts!), and more time lost while grouting and caulking. It all adds up; but the pay-off is so high... well, just look at these pictures!


elegant tile niche

Simple and elegant: this one combines a partial picture-frame effect with interior bullnose finish, all using the same tile selection and carrying layout lines cleanly through the niche. For accent, this homeowner designed a band of two-by-two tiles just above the niche frame.

basic tile niche

Even simpler: this niche displays no picture-frame effect and blends beautifully with the surrounding tile. Notice how the grab bar aligns perfectly with the centered niche.

fancy tile niche

Jazzy and artistic: one of our most recent, this is also the most complicated. It uses a double-picture-frame design and adds smaller accent tiles in the back wall for an eye-popping finished product. The accent band above the niche uses a third ribbon-tile of the same finish.

modified niche design

Blending styles: our final example uses a modified picture-frame with a 'window sill' effect, and also includes accent tiles applied to the back wall. Notice the matching band of these same accent tiles at eye level. The accessory you see below the niche is a preformed corner seat.


Tiling a tub surround and adding an integral niche is typically beyond the skills of do-it-yourselfers.

When you're contracting professionals to do a job like this, however, it's nice to know you have plenty of choices. In addition, once you have an idea of the extra work involved, you might not be quite as easily shocked at the prices quoted. Keep in mind that a tile niche can be expected to last 30 to 50 years, same as the rest of the tiling in your remodeled bathroom.

All photos copyright 2010 by dzyne -- reprint with attribution please. _______________________________________________
Which niche looks best to you?  Do you prefer the simplistic approach, or like it better when the niche becomes a design focal point?

If you've had your bathroom remodeled using ceramic or porcelain tile and would like to share a picture of it here, please contact me via comments or my email link. If you'd like to learn more about tile topics, see our companion DIY Tile Zone hosted by Helium.com.