+edit.jpg)
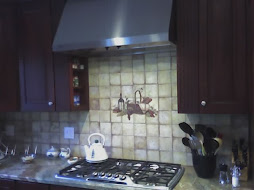
 I finally bought a digital camera, by accident: it came inside my new phone. Now I can post simple descriptions of interesting jobs we've done, and let the pictures do most of the talking. This job was a tricky one, a referral from a friend who specializes in new flooring. He was smart to hand it off, but he did miss out on all the fun! Here's my view from the driveway, approaching my new customer's house.
 The new owner of this lovely home, Roman Jones (not his real name), made a dreadful discovery after he bought the place. When he removed the unwanted carpeting from his foyer staircase, he found the treads underneath were made of particle board. He thought they were hardwood, like all the rest of the floors downstairs. That's when Roman called my flooring friend and asked him to quote an extreme make-over, staircase edition. Mike, the floor-guy, considered replacing all the old particle board treads with new maple treads. That would have been a lot easier than what we ended up doing, but it also would have created some structural issues. This staircase was built in a factory, as a unit. In my opinion, tearing the treads out could have weakened the whole stair system. Since I have to offer a warranty on whatever work I perform, I decided to seek advice from people who build stairs for a living.
 The solution, after a couple of consults, was to cover the old treads with new solid-maple treads and nosings. These specialty parts were created from maple planks by Steve, at Pittsford Lumber Co. in upstate NY. The rest was up to us, to assemble the pieces on site. That involved a great deal of careful measuring and sanding. (Notice the tarping in the next photo.) Here's a shot of the job, in progress, with spindles removed and ready for surgery on the existing stair-treads. My partner, another Mike, and I cut all the original particle board overhangs off. This part of the job created tons of dust and debris, and called for all sorts of violent tools. We used a power saw, jigsaw, handsaw, chisels, and both belt-sander and cordless router. Not to mention the mighty shop-vac, which probably ran more than any other single tool.
 pieces on site. That involved a great deal of careful measuring and sanding. (Notice the tarping in the next photo.) Here's a shot of the job, in progress, with spindles removed and ready for surgery on the existing stair-treads. My partner, another Mike, and I cut all the original particle board overhangs off. This part of the job created tons of dust and debris, and called for all sorts of violent tools. We used a power saw, jigsaw, handsaw, chisels, and both belt-sander and cordless router. Not to mention the mighty shop-vac, which probably ran more than any other single tool.
 The carpentry work itself (the fun part) involved a fairly intricate mating of quarter-inch solid tread material with the front and side nosings. We devoured two bottles of wood glue and several dozen strategically-placed pin-nails (air-driven). At this stage of the project, my heavy Porter-Cable belt sander made everything come together. We added some maple-formula wood filler as needed. Sanding progressed from 120-grit belts to 220-grit detail pads. Once again, the shop-vac racked up the most hours! (But the tarps worked -- very little dust reached the adjoining rooms.)
 All together, the work spanned ten days (about sixty man-hours). Making all that carpentry look pretty called for the services of my previously-unused cordless "mouse" sander, and quite a few sheets of 220-grit paper. Maple requires pre-treatment,  but looks best without any color added. We used a fast-drying polyurethane finish: two coats, sanded between, applied with a bristle brush. I checked Minwax.com first, and noticed they advised against using the popular foam brushes for this product -- too many bubbles. I have to admit, the results were pretty spectacular. I'm not much of a finisher; I prefer cutting, gluing, and nailing to brushing. By the time I enlisted my oldest son's help to re-install the original spindles (final photo), this refurbished staircase looked like a million bucks. The home-owner will paint the risers and stringers white, to complete the new look. I'm proud to say, "I built that"!
 but looks best without any color added. We used a fast-drying polyurethane finish: two coats, sanded between, applied with a bristle brush. I checked Minwax.com first, and noticed they advised against using the popular foam brushes for this product -- too many bubbles. I have to admit, the results were pretty spectacular. I'm not much of a finisher; I prefer cutting, gluing, and nailing to brushing. By the time I enlisted my oldest son's help to re-install the original spindles (final photo), this refurbished staircase looked like a million bucks. The home-owner will paint the risers and stringers white, to complete the new look. I'm proud to say, "I built that"!


.jpg)


No comments:
Post a Comment